
Table of Contents
- Introduction
- Accessing the Data Import Tool
- Using Payroll Configuration Template
- Importing New Payroll Data
- Updating Existing Payroll Data
- Using Custom Fields
1. Introduction
This guide focuses on importing and updating records in the Payroll Master using the Data Import Tool. The tool allows for efficient, bulk data entry or modification, reducing the need for manual record creation.
Watch the Video Guide to understand more.
2. Accessing the Data Import Tool
To open the Data Import Tool, navigate to:
HAL FRAMEWORK BUILDERS >> Data Import
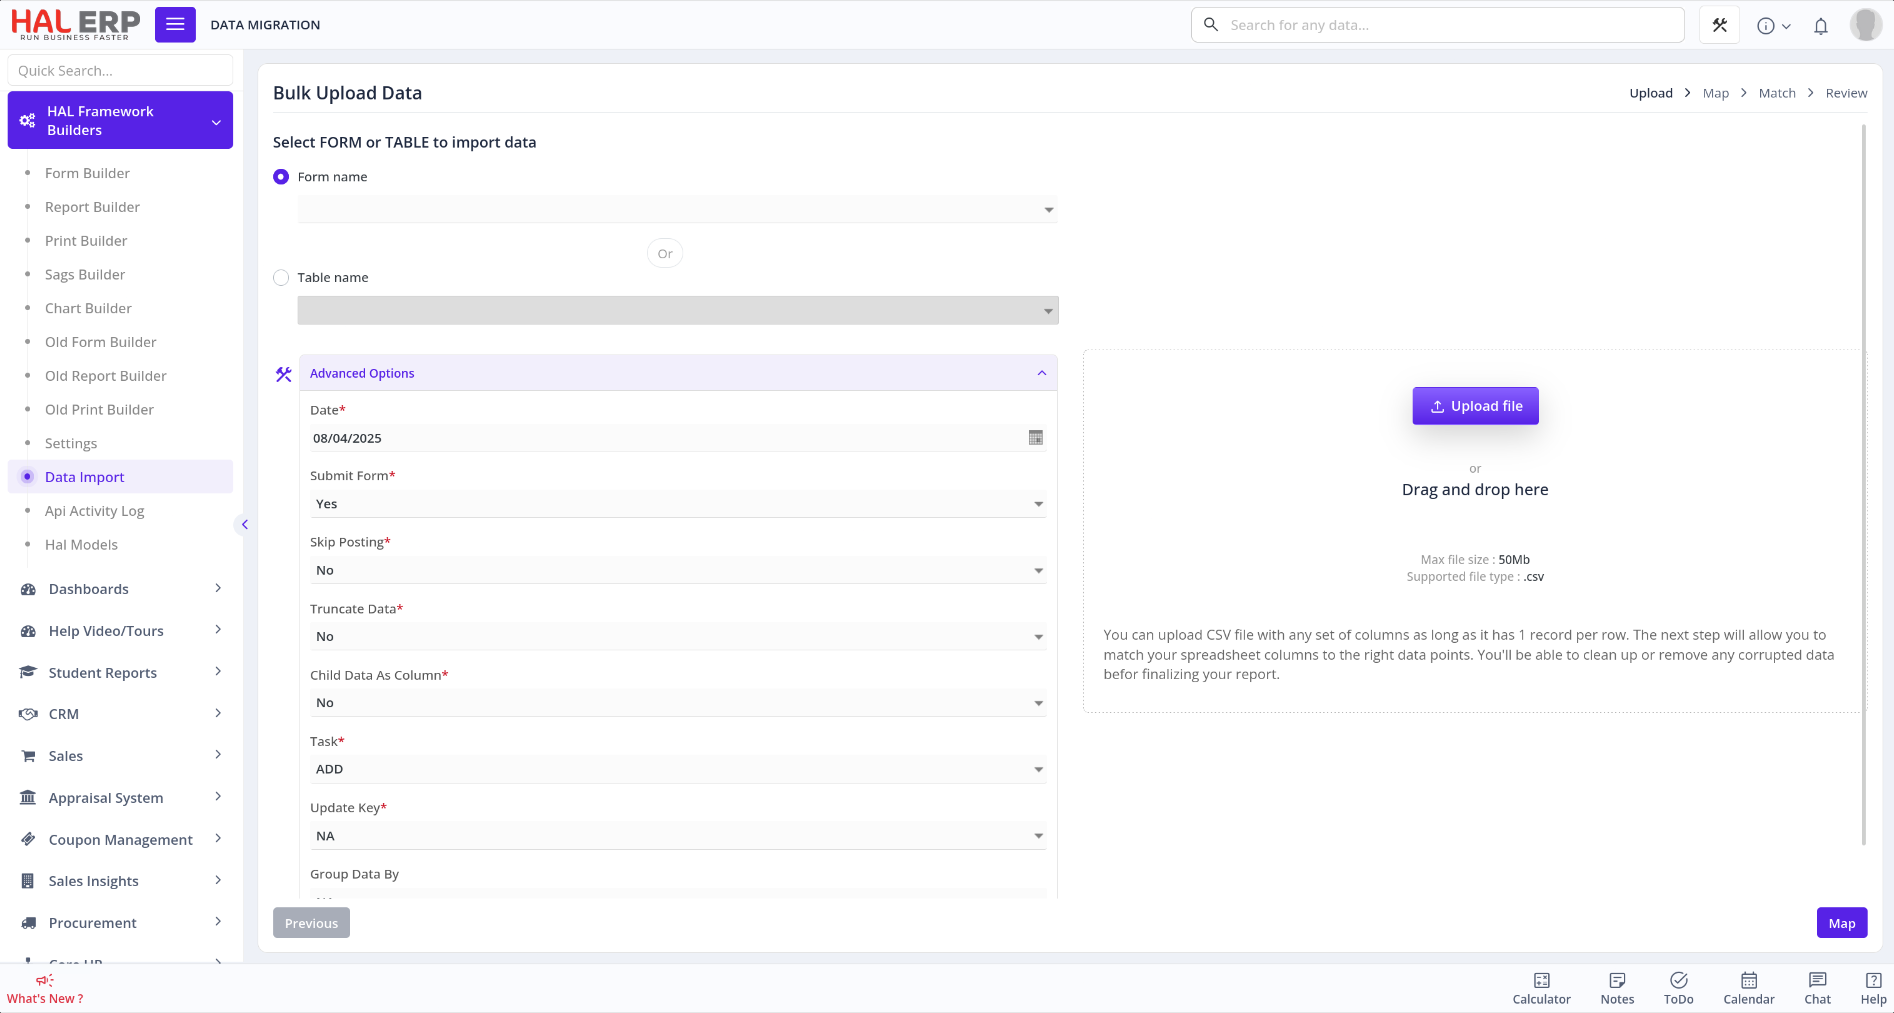
From here:
- Select the Form Name option.
- Choose Payroll Configuration from the Form Name drop-down.
- Upload your prepared .csv file either by browsing or dragging it into the upload area.
- Expand Advanced Options to configure import settings.
Advanced Options (specific to Payroll data):
-
Truncate Data: Set to YES if the current Payroll records should be deleted and replaced with the new data.
-
Task:
- ADD – To insert new records.
- UPDATE – To update existing records.
-
Update Key (only when Task is UPDATE): Select the field (e.g.,
Payroll Header.Employee) used to identify which record to update.
3. Using the Payroll Master Template
Use the designated Payroll Master template, available here: Payroll Master Template (Google Sheet)
Template Structure:
-
Row 1: Contains system-level column names (e.g.,
Payroll Header.Employee,Payroll Header.Active?) used for automatic field mapping. -
Row 2: Human-readable labels (e.g.,
Employee,Active?) to help users understand what data to enter. -
Mandatory Fields: Highlighted in red—these must be filled in to avoid errors.
-
Data Format Guidelines:
- Dates: Use
DD/MM/YYYYformat. - Amounts: Enter numbers without commas (e.g.,
12000.00, not12,000.00).
- Dates: Use
Refer to the pre-filled sample entries to understand expected input for each field.
4. Importing New Payroll Data
Steps:
Fill in the template with new payroll data and download it in .csv format.
Navigate to:
HAL FRAMEWORK BUILDERS >> Data Import
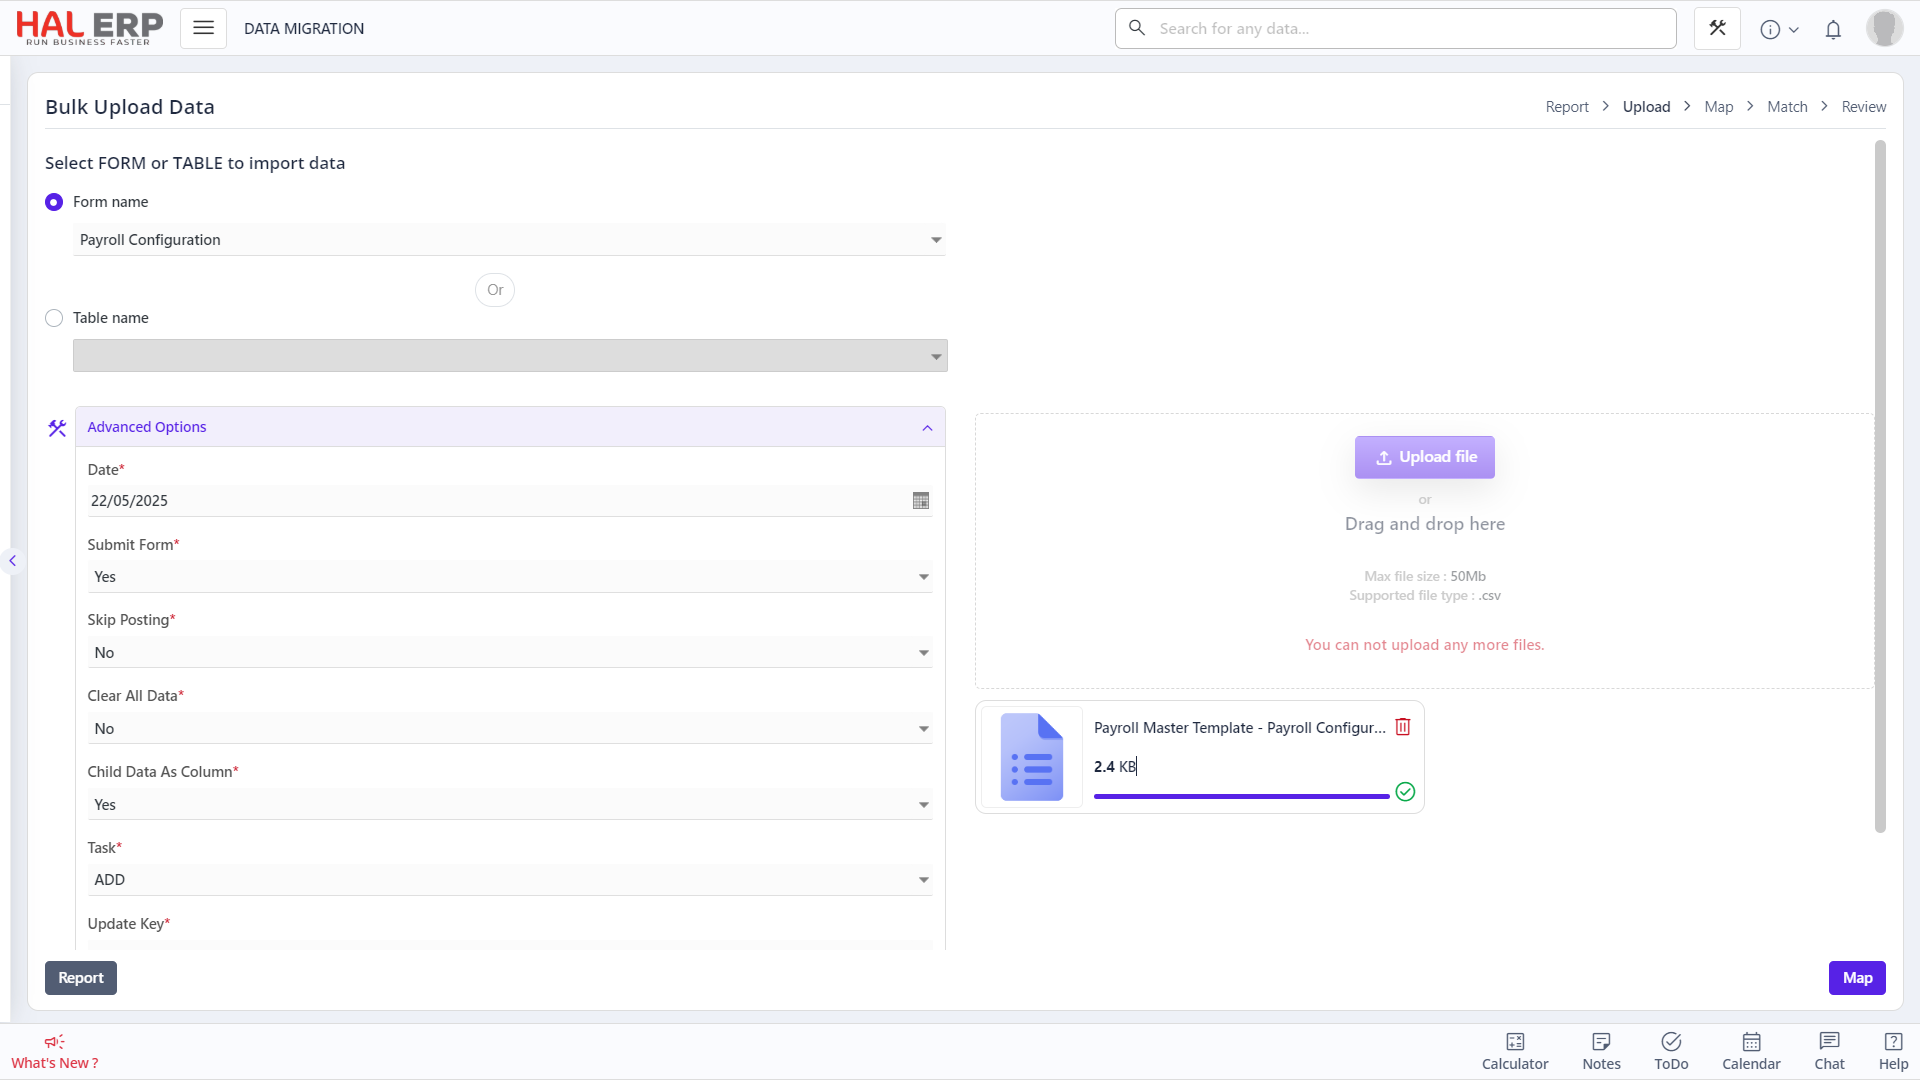
Select:
- Form Name:
Payroll Configuration - Upload File: Browse or drag your .csv file.
Expand Advanced Options:
-
Task: Set to ADD
-
Truncate Data: Set to YES only if you want to clear all existing payroll data.
-
Child Data As Column: Set to YES.
This is a <strong>VITAL</strong> Step! Setting this option to <strong>Yes</strong> allows you to enter data that is supposed to go into a grid as if it were columns. So data such as Casual Leaves, Emergency Leaves will be in columns in your template but in the form, they are in a separate grid.
Click Map and wait on the page to load.
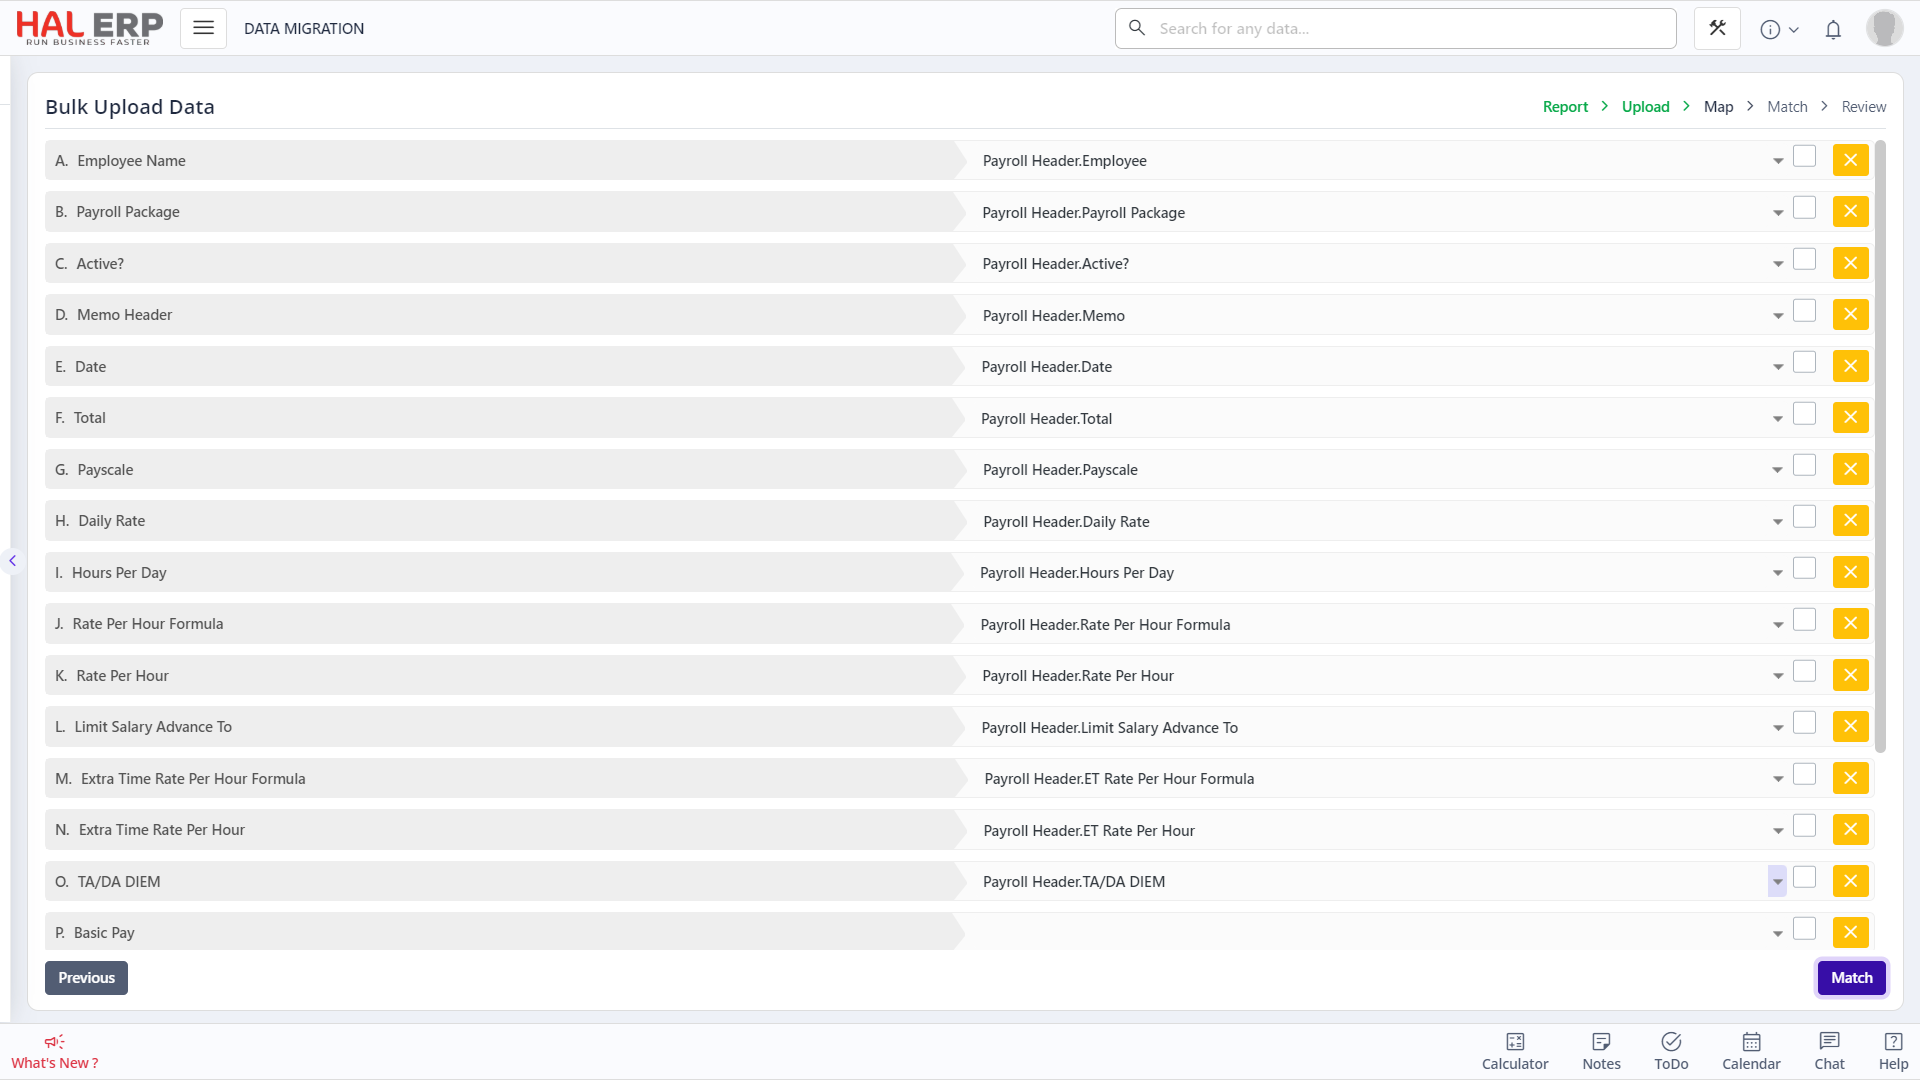
- The left column shows column headers from your uploaded CSV (Row 2 of the template).
- The right column shows the mapped ERP field (auto-mapped using Row 1 of the template).
<span dir="ltr">For this module, All the data that has been made from Child Data as Columns need to be mapped manually. So for a column of data on "<strong dir="ltr">Basic Pay</strong>" should be mapped to <strong dir="ltr">"Payroll Items.Amount | Basic Pay". </strong>Example shown below in the highlighted cell -></span>
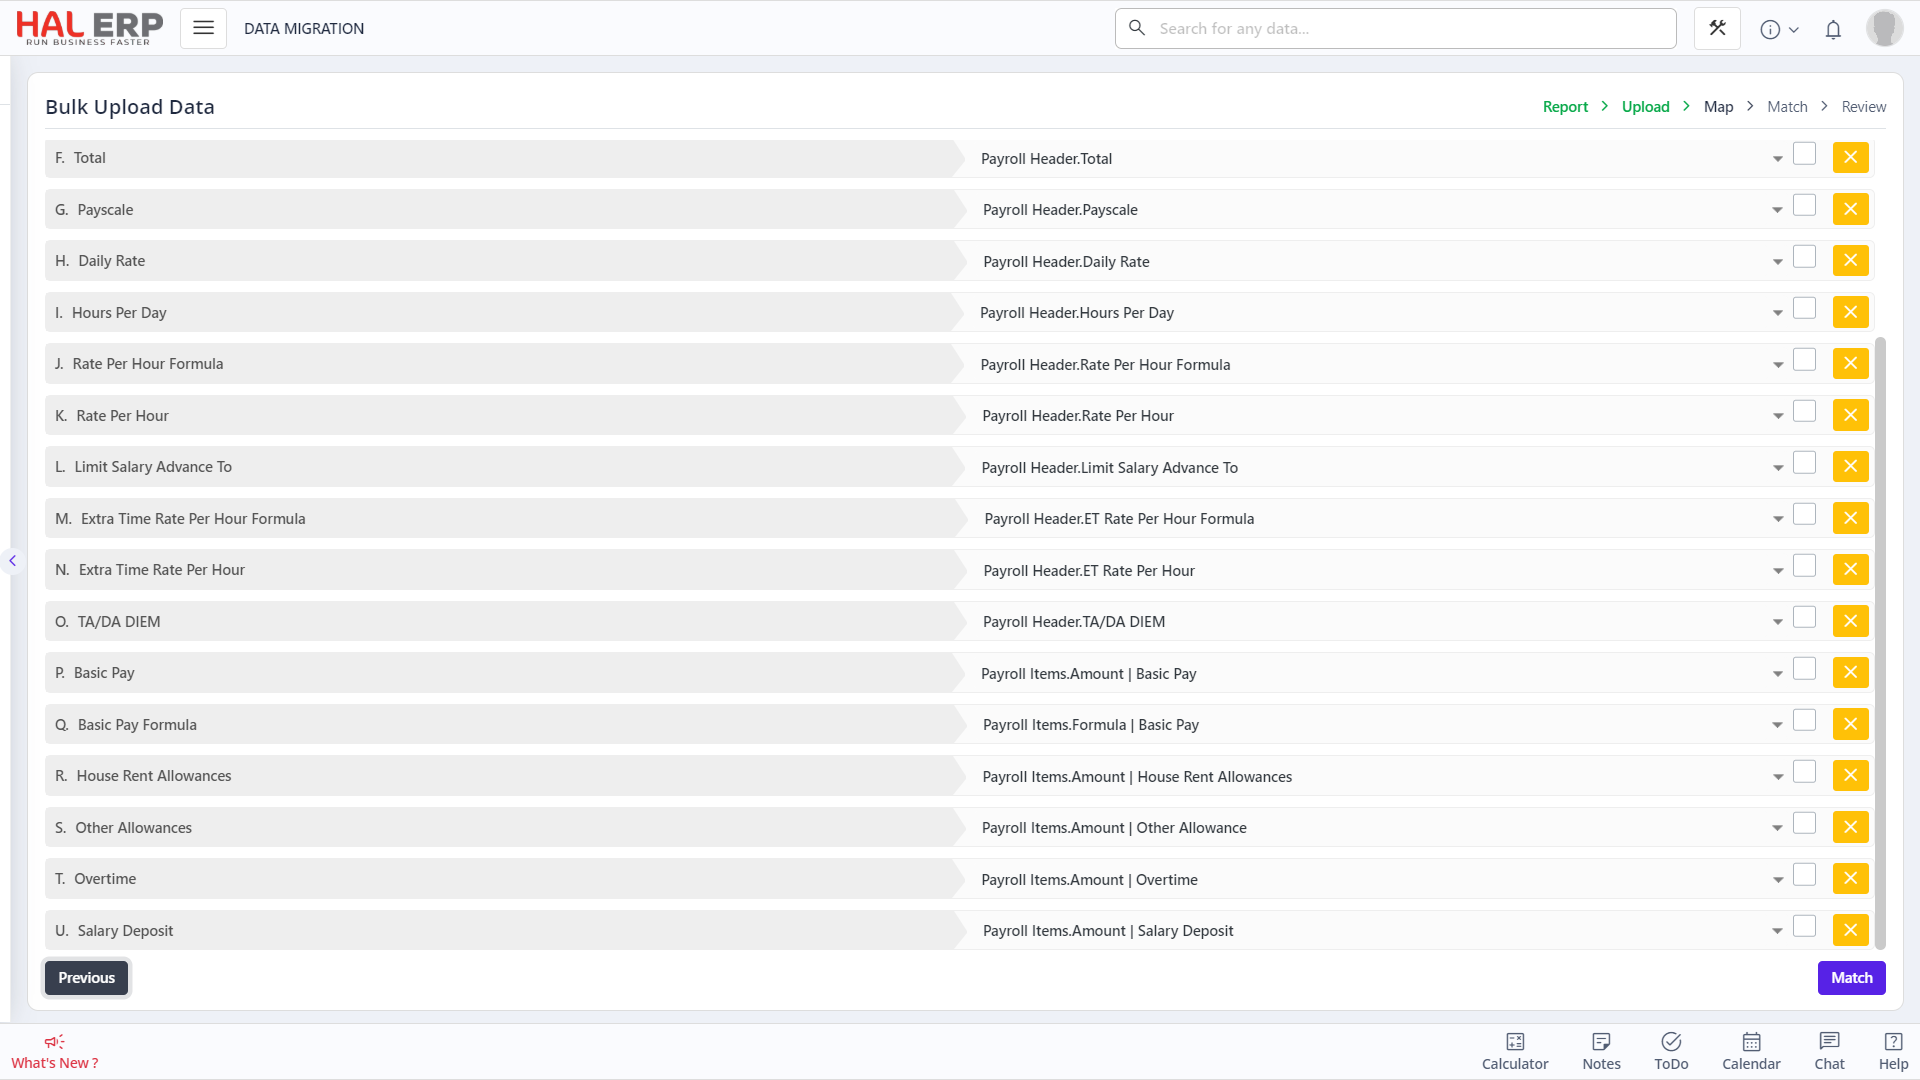
Click Match to review matched columns.
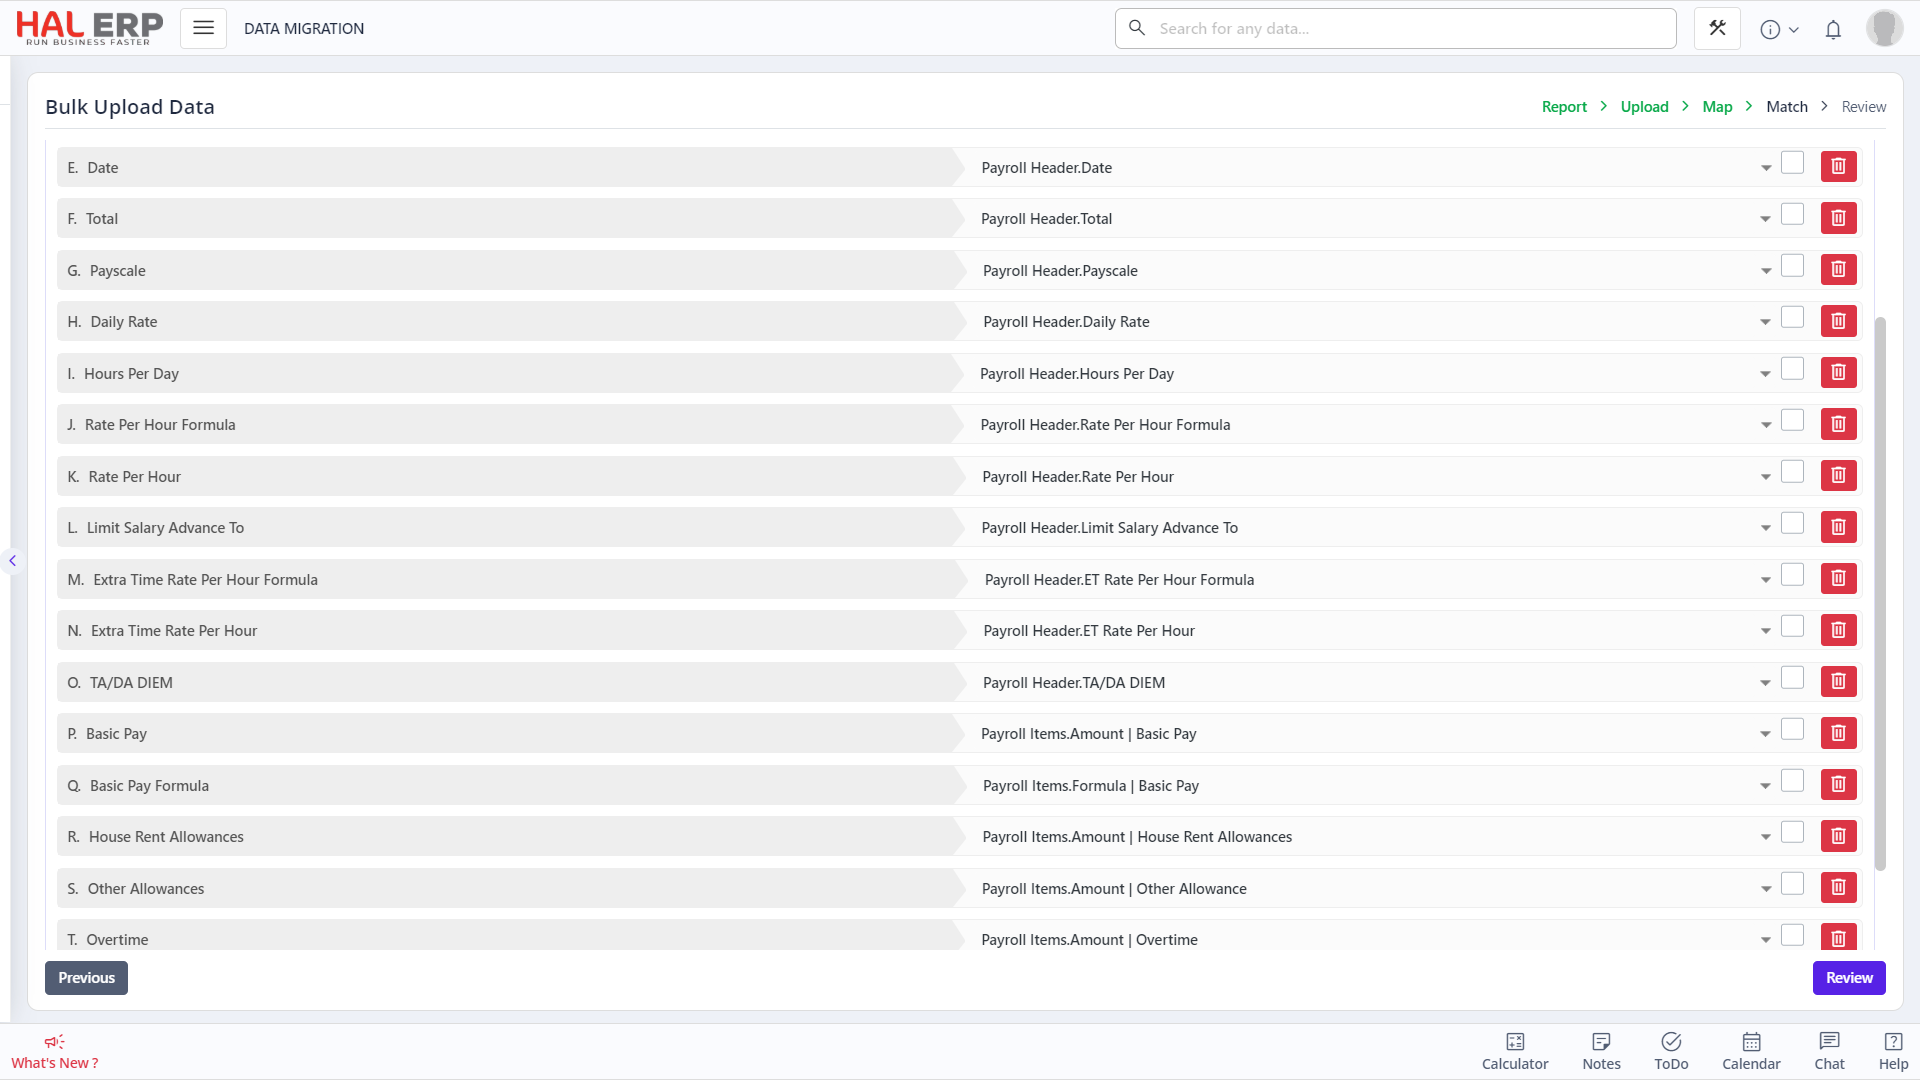
- Remove any unnecessary mappings or columns if needed.
- Check for any error messages that might show up now such as "Duplicate Columns"
- Then click Review.
On the Review page:
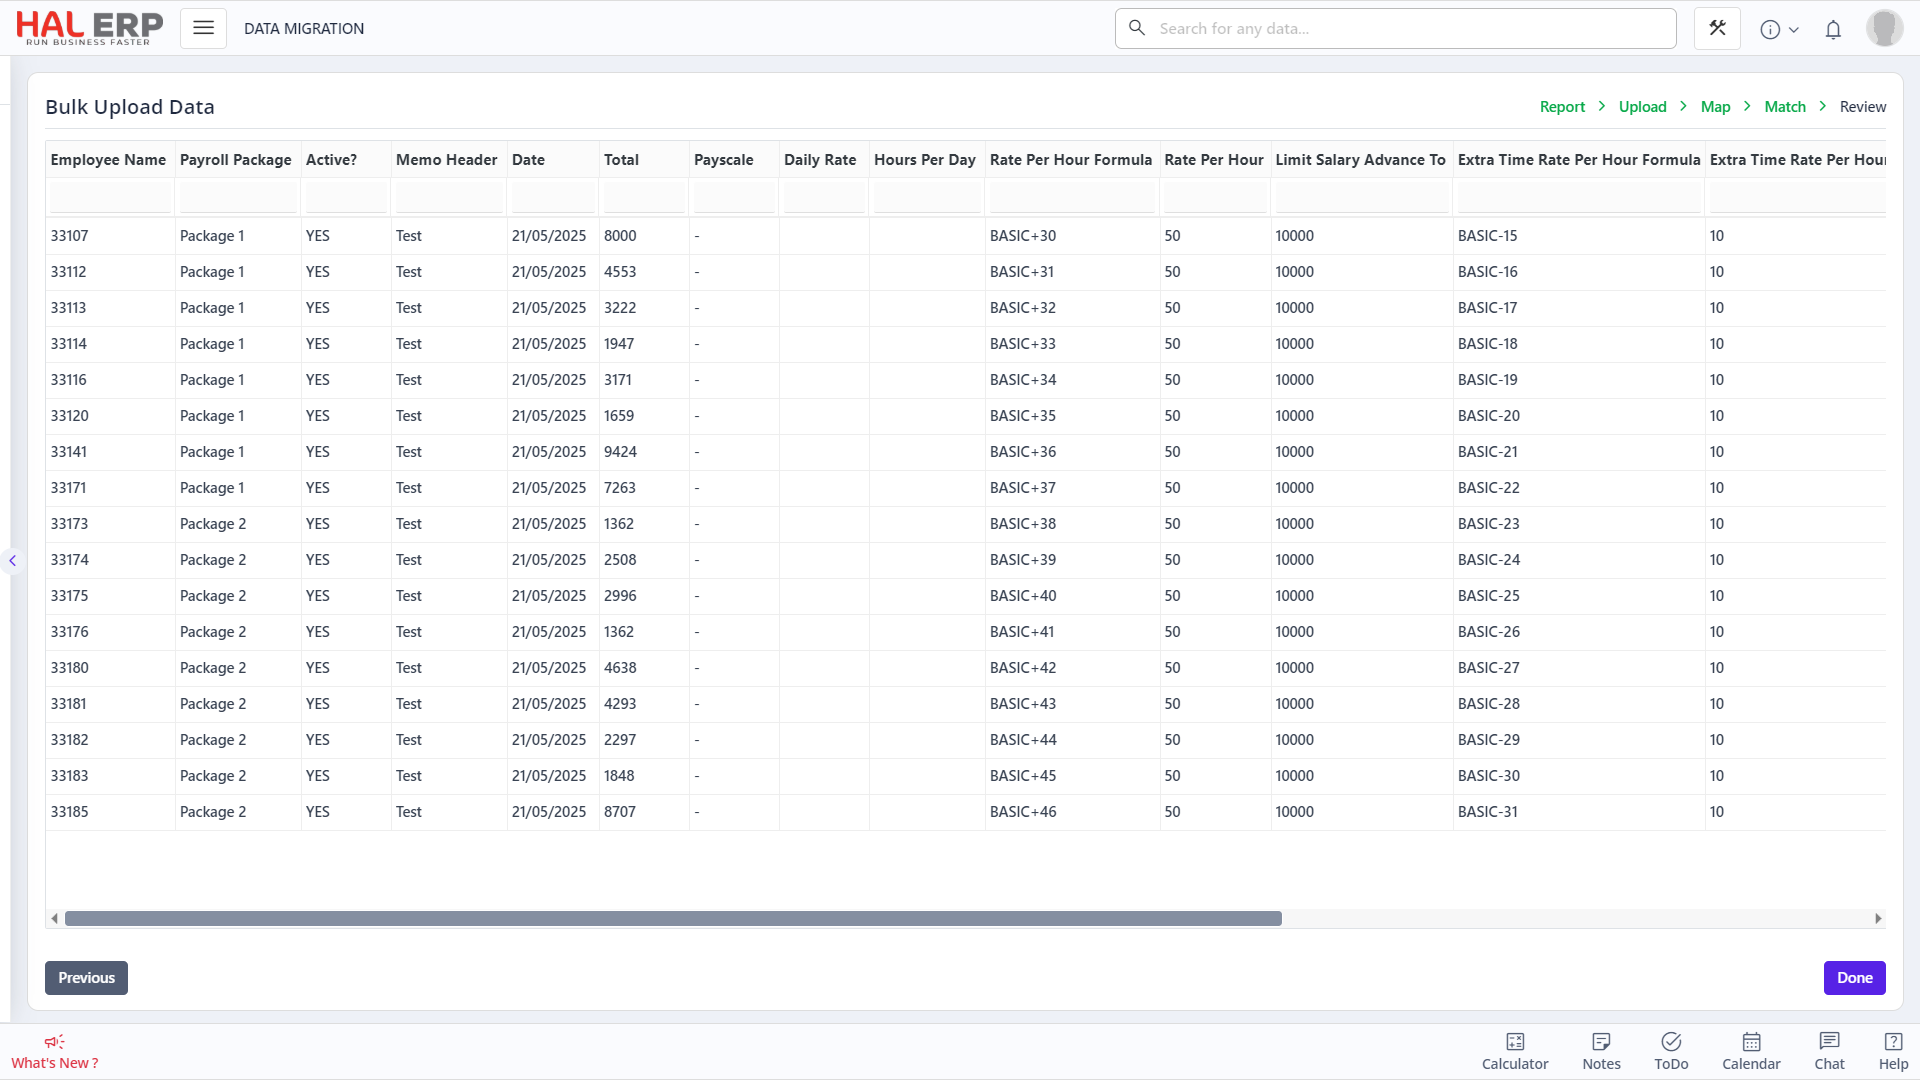
- Review uploaded data for format and accuracy.
- Errors (e.g., incorrect formats or missing required fields) will be highlighted. You can correct them directly here.
Click Done to initiate the import.
- If successful, a notification will appear.
- A prompt will ask you to reload. Regardless of your choice, the import will be complete.
Verify if the Import has been successful:
Go to:
Payroll >> Payroll Master
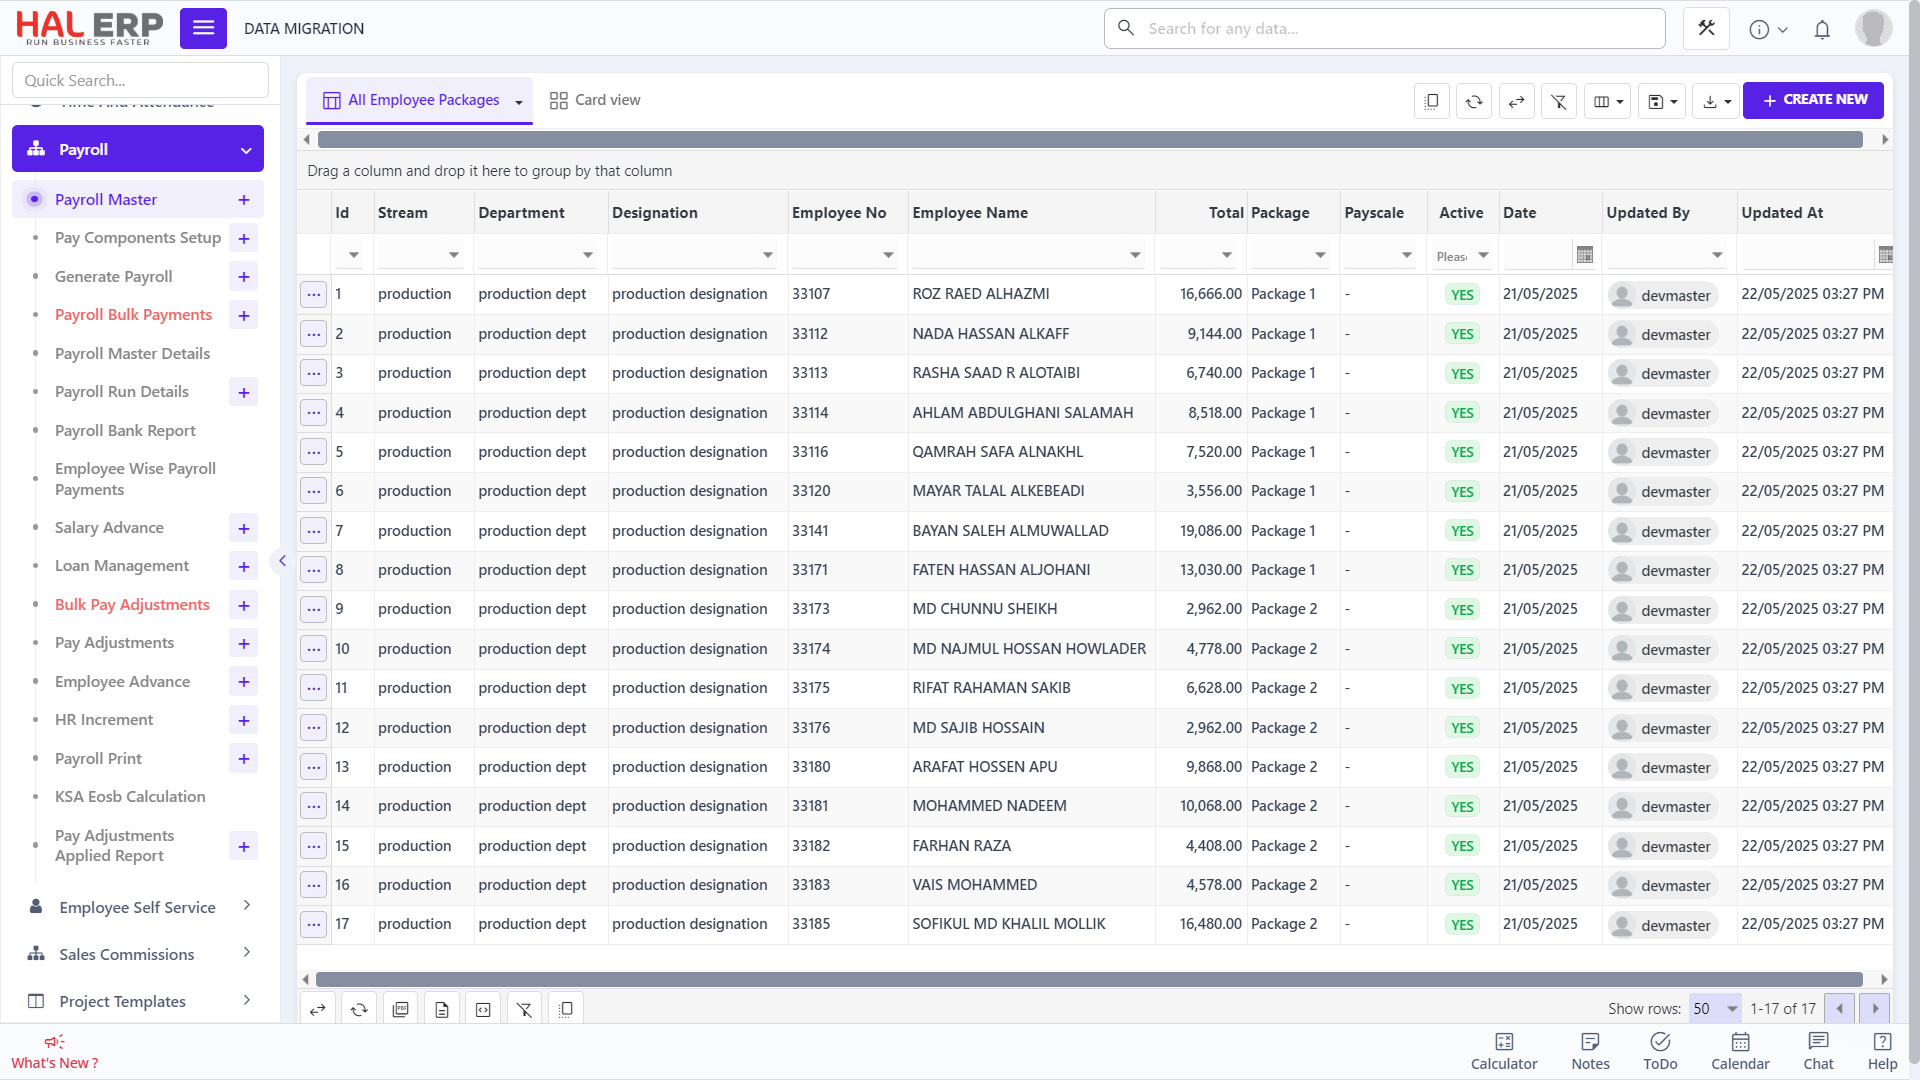
View and manually verify the imported records.
5. Updating Existing Payroll Data
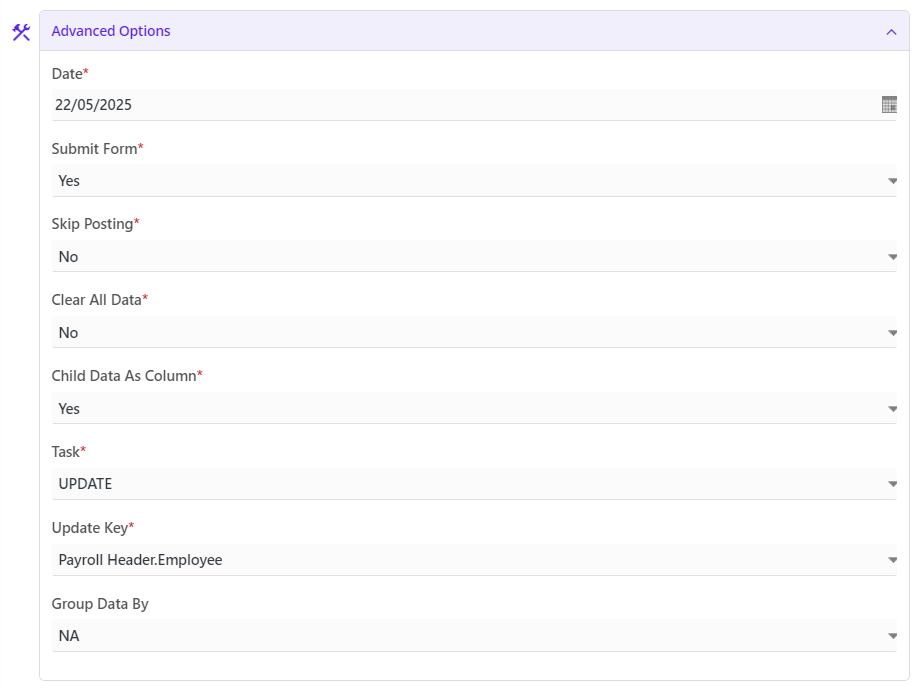
The process for updating existing payroll records is similar to importing new ones, with one key change:
-
On the Data Import page:
- Set Task to UPDATE
- Set Update Key to the unique identifier in your data
[i.e Payroll Header.Employee] - Ensure that the Unique Identifying data is also included in the uploaded document. If it is not, then the column would be added automatically to the document and you can input the data in the Review Page.
-
Follow the same steps as in Section 4 from Upload through Review.
-
After clicking Done, verify that the updated values are reflected in:
Payroll >> Payroll Master
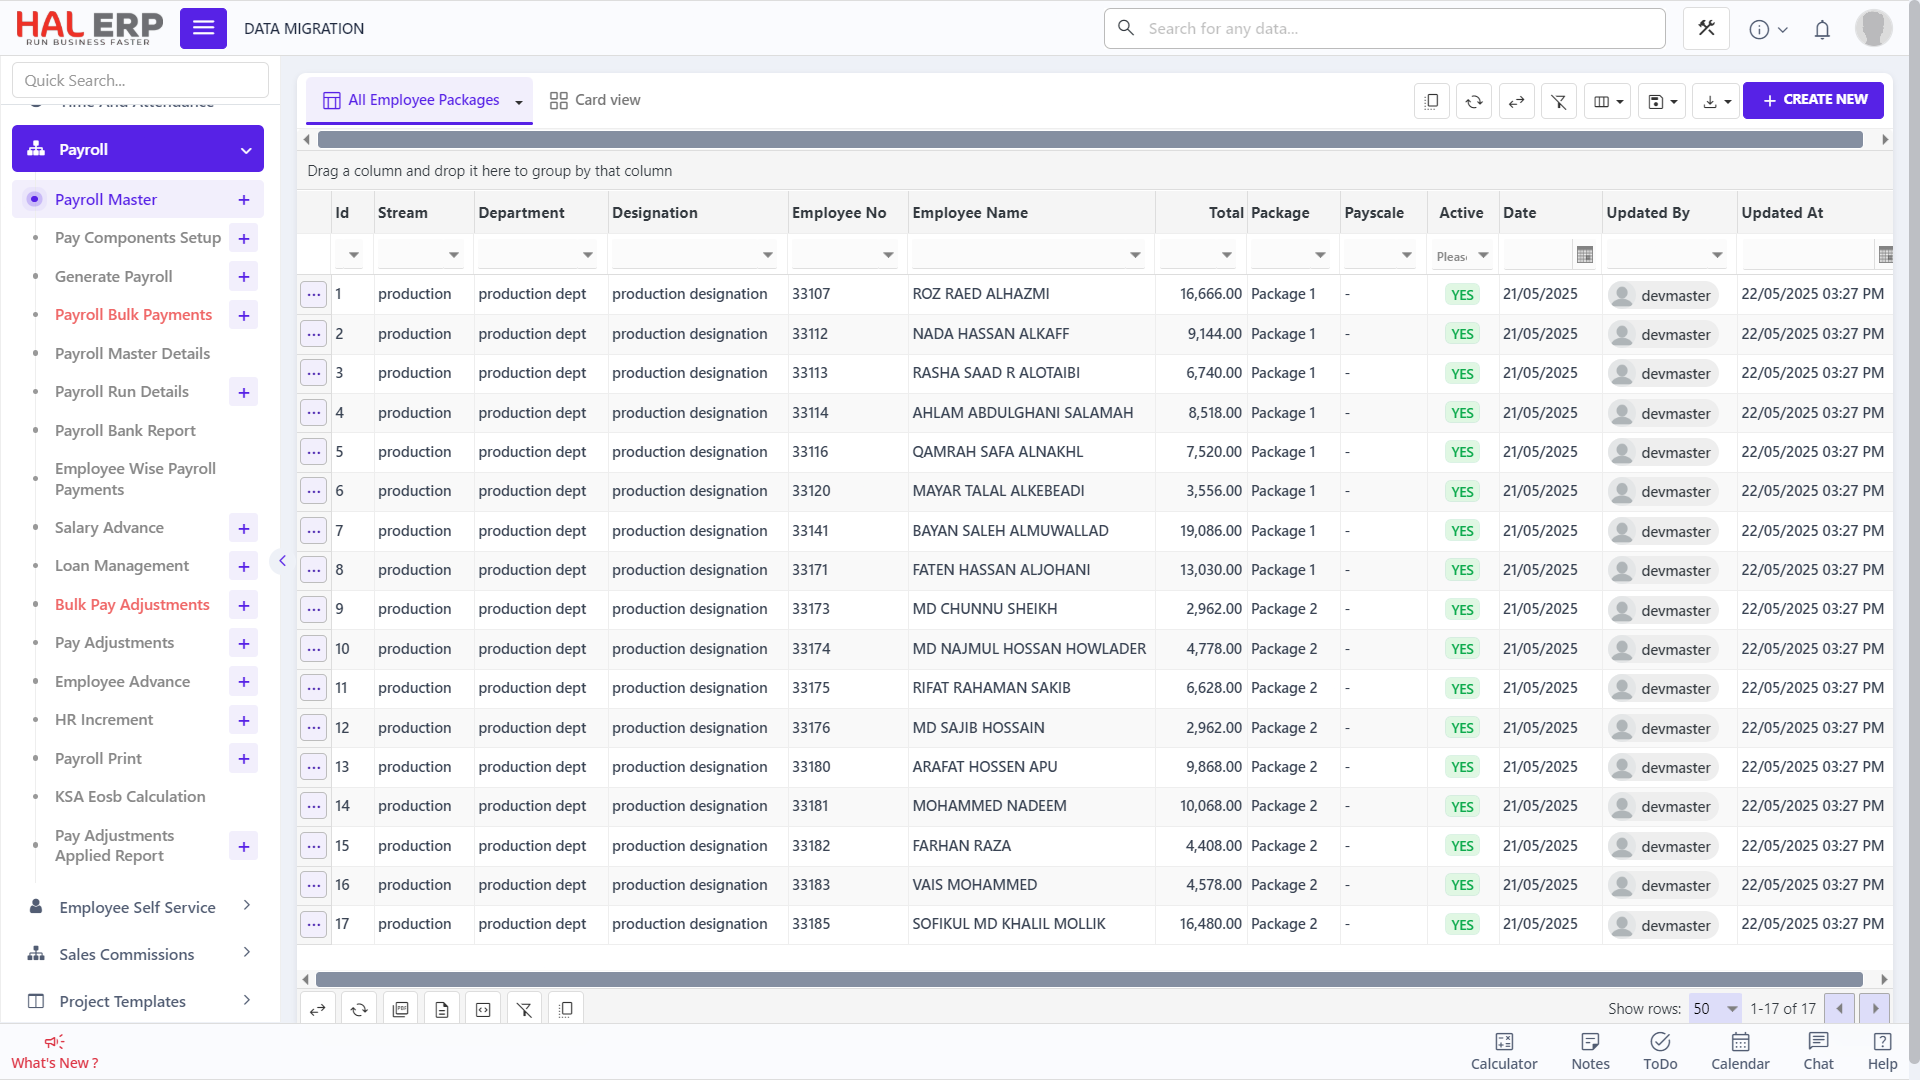
Open individual records to confirm that updates have been applied correctly.
6. Using Custom Fields
Sometimes Clients need or want Custom Fields to use in their template, so to know how to make a custom field, view the Data Import General Guide, Chapter 3.