
Table of Contents
1. Objective
2. Foodics Setup in OneApp
3. Setup in HAL
4. Map Branch to Outlet
5. Map Payment Methods
**6. Set up charges and the default customer in HAL. ***7.Sync Orders from One APP **8. Run Command 1. Objective:
This document outlines the process of integrating the POS provider (Foodics) account into our ERP system using a One App. Orders will be fetched from Foodics through the one app when sync and stored in the oa_sync tables. From the oa_sync tables, transactions will be created in our HAL ERP system.
2. Foodics Setup in One App
2.1 Login to One App
- Access the One App environment by navigating to dev.oneapp.live or oneapp.live using devmaster login credentials
- Credentials
- Login: devmaster@halerp.com
- Password: hal_324462
2.2 Create a Company
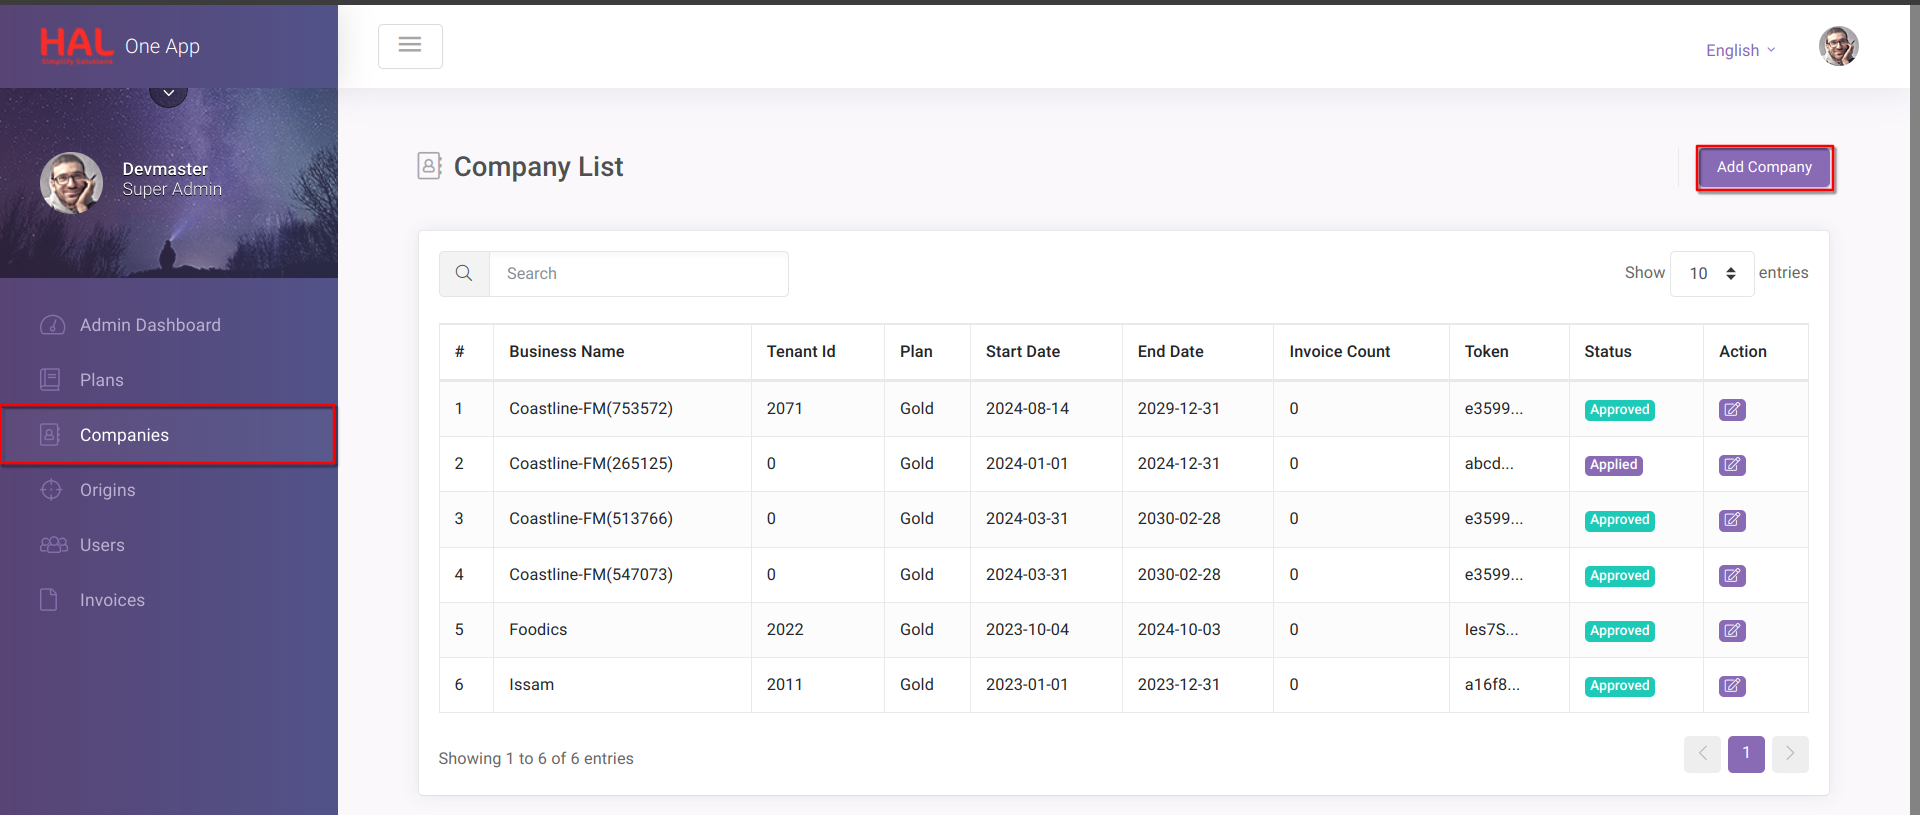
- Click on Add Company.
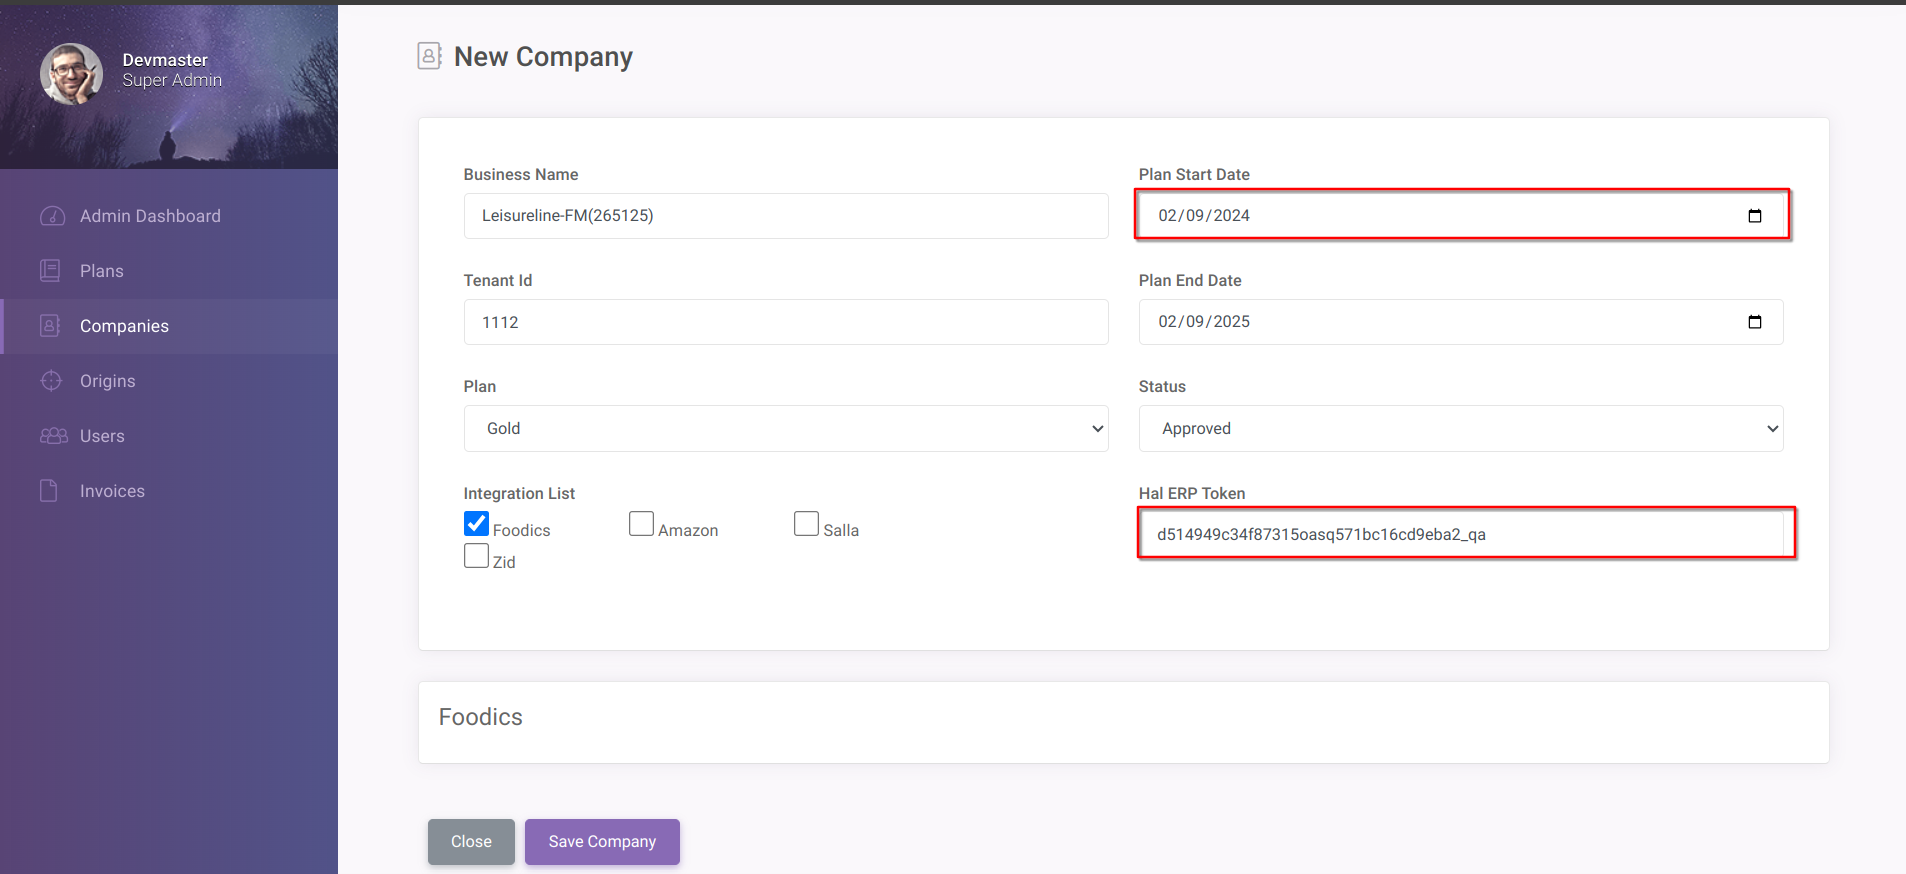
- Business Name: The name should be the tenant name along with the Foodics account number.
- Plan Start Date: It should be the date prior to when we start fetching the orders from Foodics (obtain the start date from the tenant).
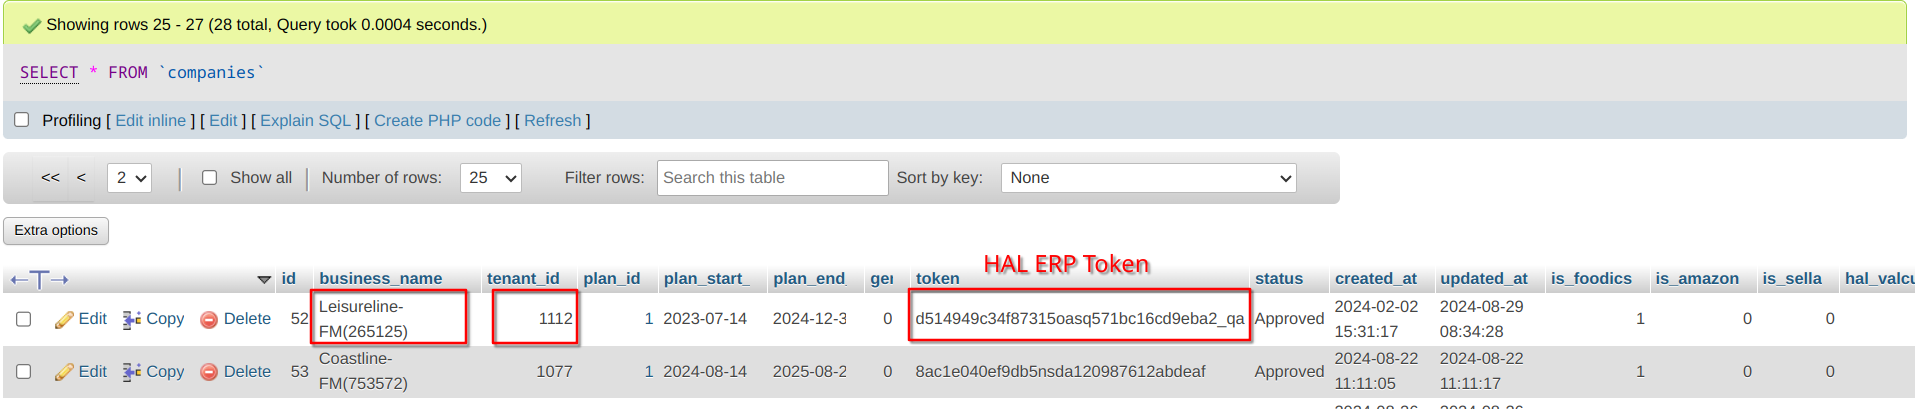
- HAL ERP Token: Add the HAL ERP token and Tenant Id, which we can retrieve from the companies table in hal_oneapp_dev.
Set the Foodics token in the "foodics_access_token" column and configure the below columns based on the requirements.
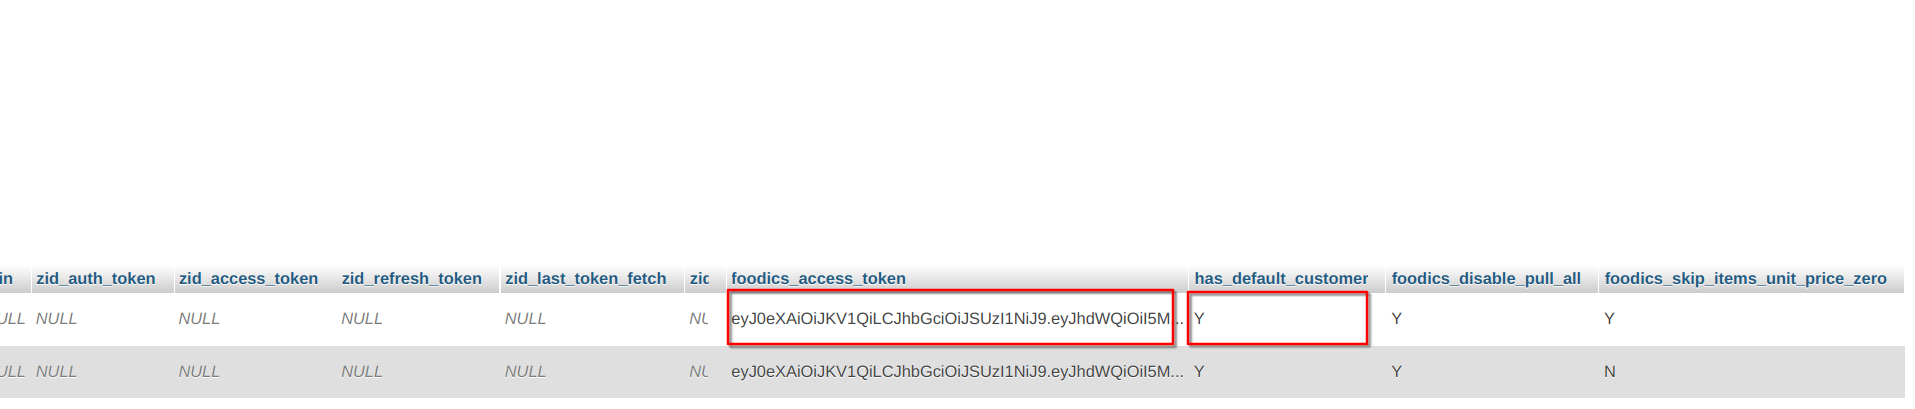
Configs :
-
has_complementary_item - If set to Y, it means that when the order includes complementary items (i.e., unit price zero and tax is zero), those items will be included in the sales receipt transaction.
-
foodics_skip_items_unit_price_zero - When we fetch data from Foodics by syncing new orders in one app for the first time, enable the configuration set it to Y. Once the sync is complete, disable it by setting it to N.
-
has_default_customer - This means that if an order in the Foodics account does not have a customer name, we will create a transaction using the default customer name when the default customer is set to Y."
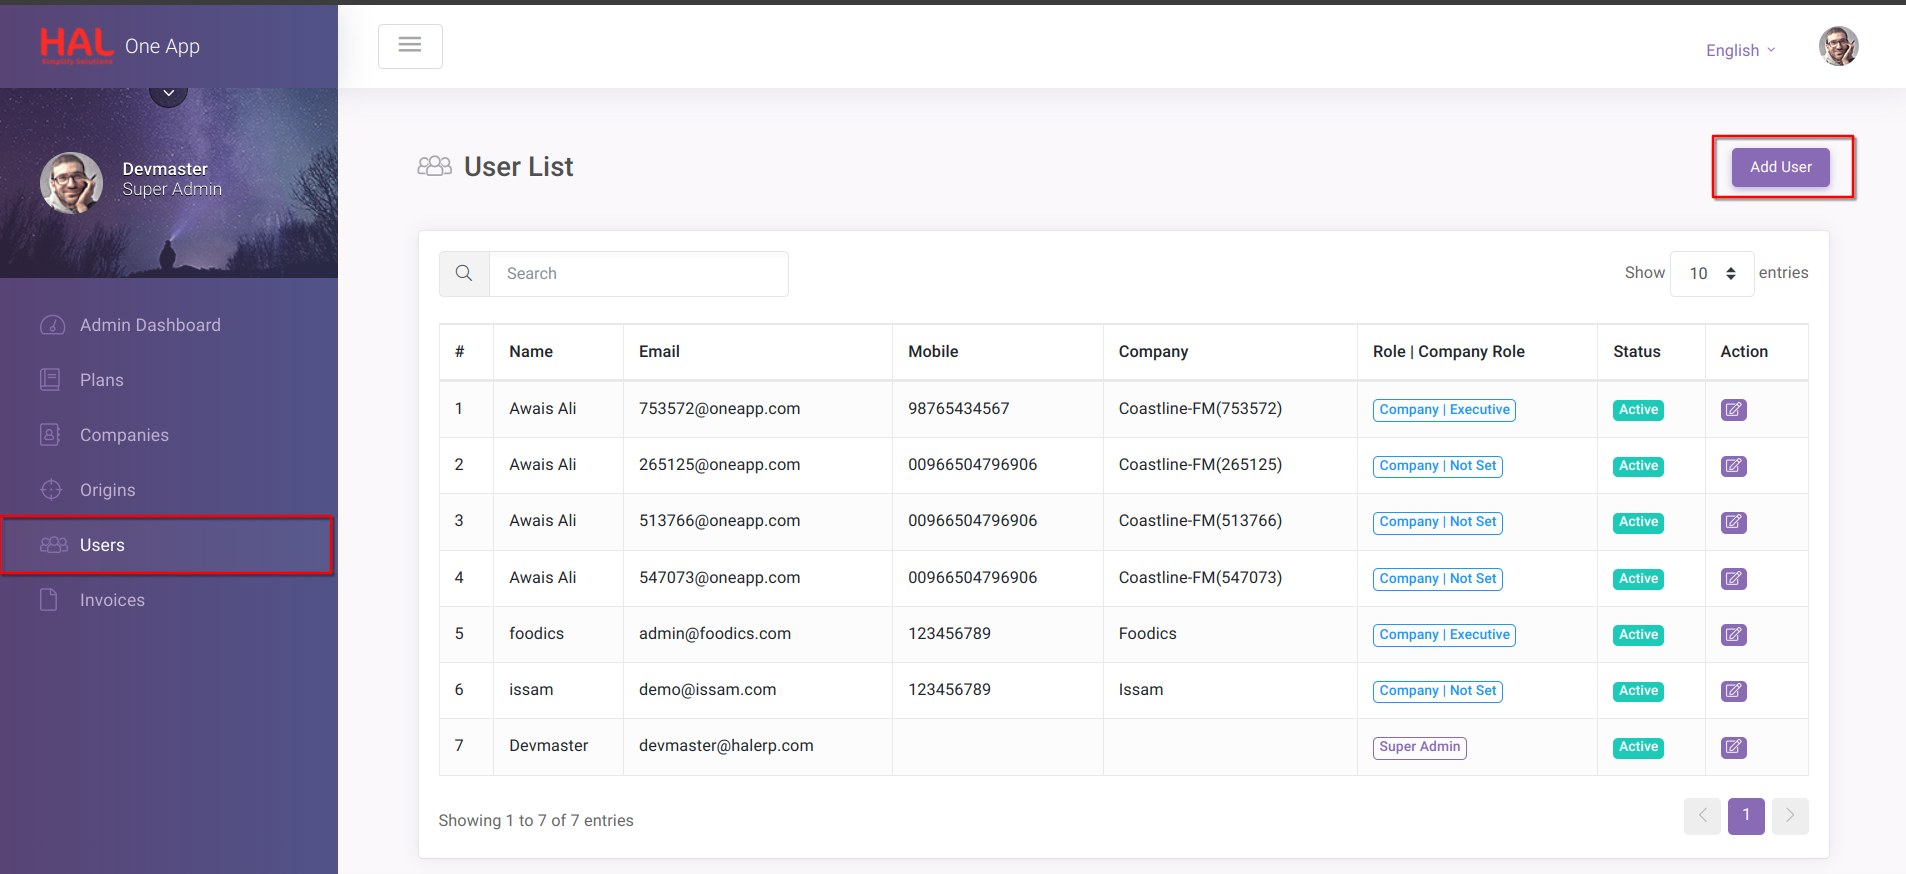
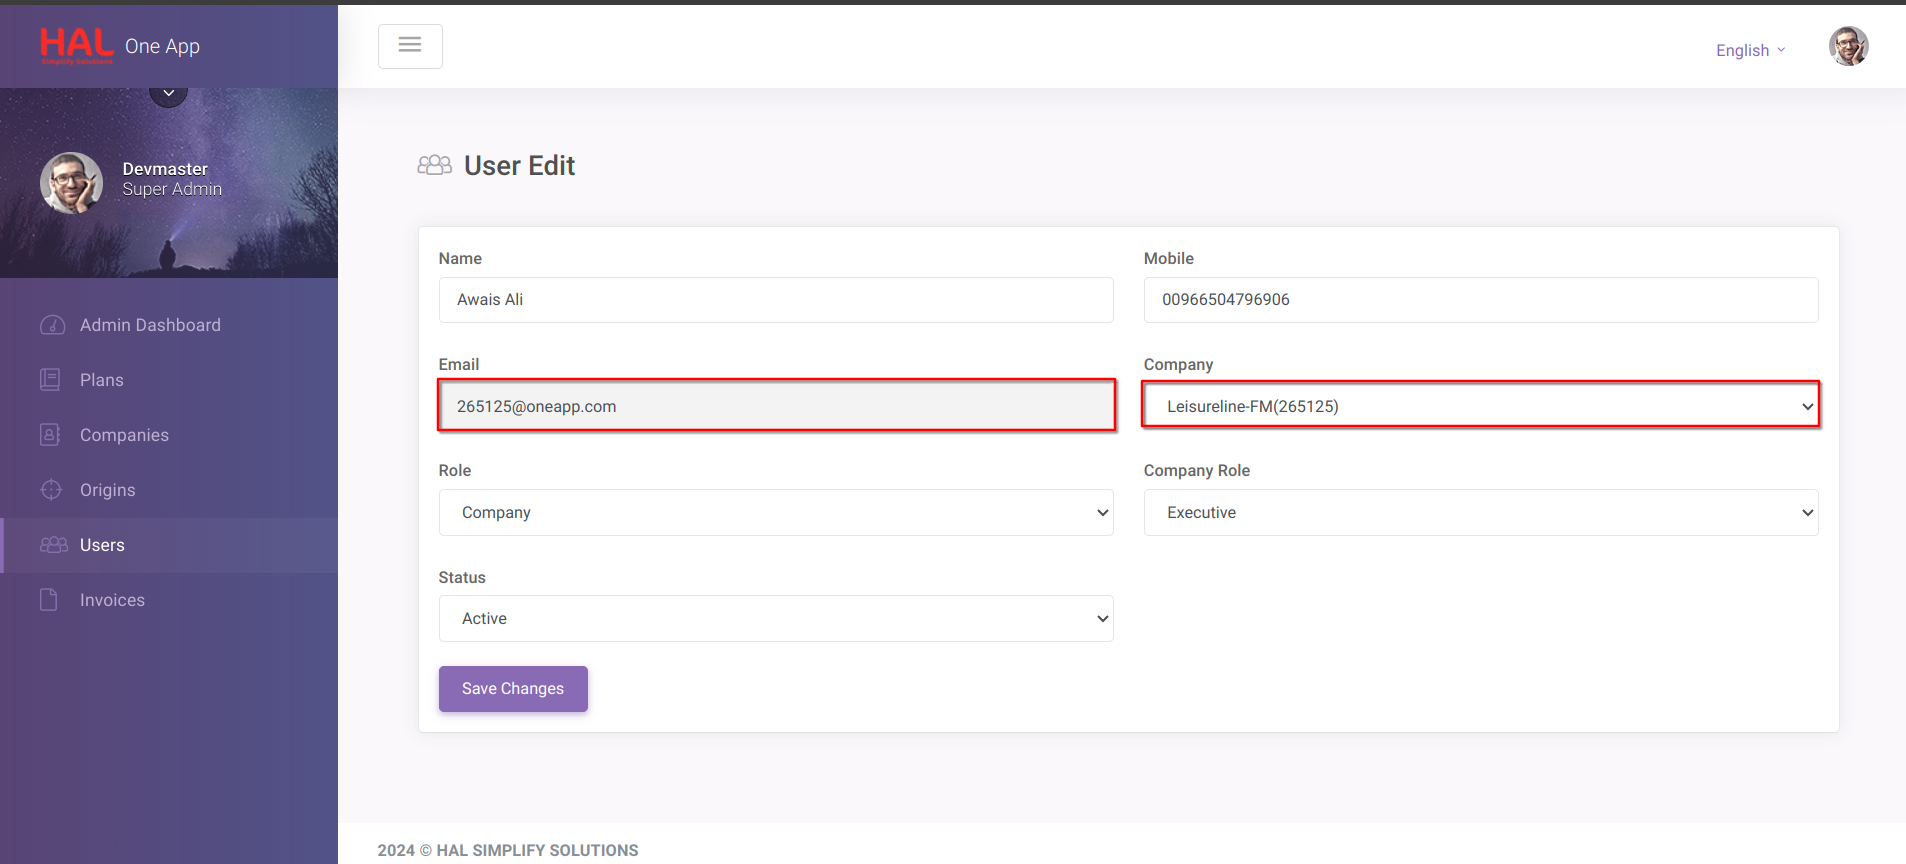
2.3 Create a User
- Create a user in One APP. Click on Add User.
2.4 Login as the User
- Once the user is created using the devmaster login credentials, log in to OneApp with the newly created user credentials.
- Example:
- Login: 265125@oneapp.com
- Password: 12345678
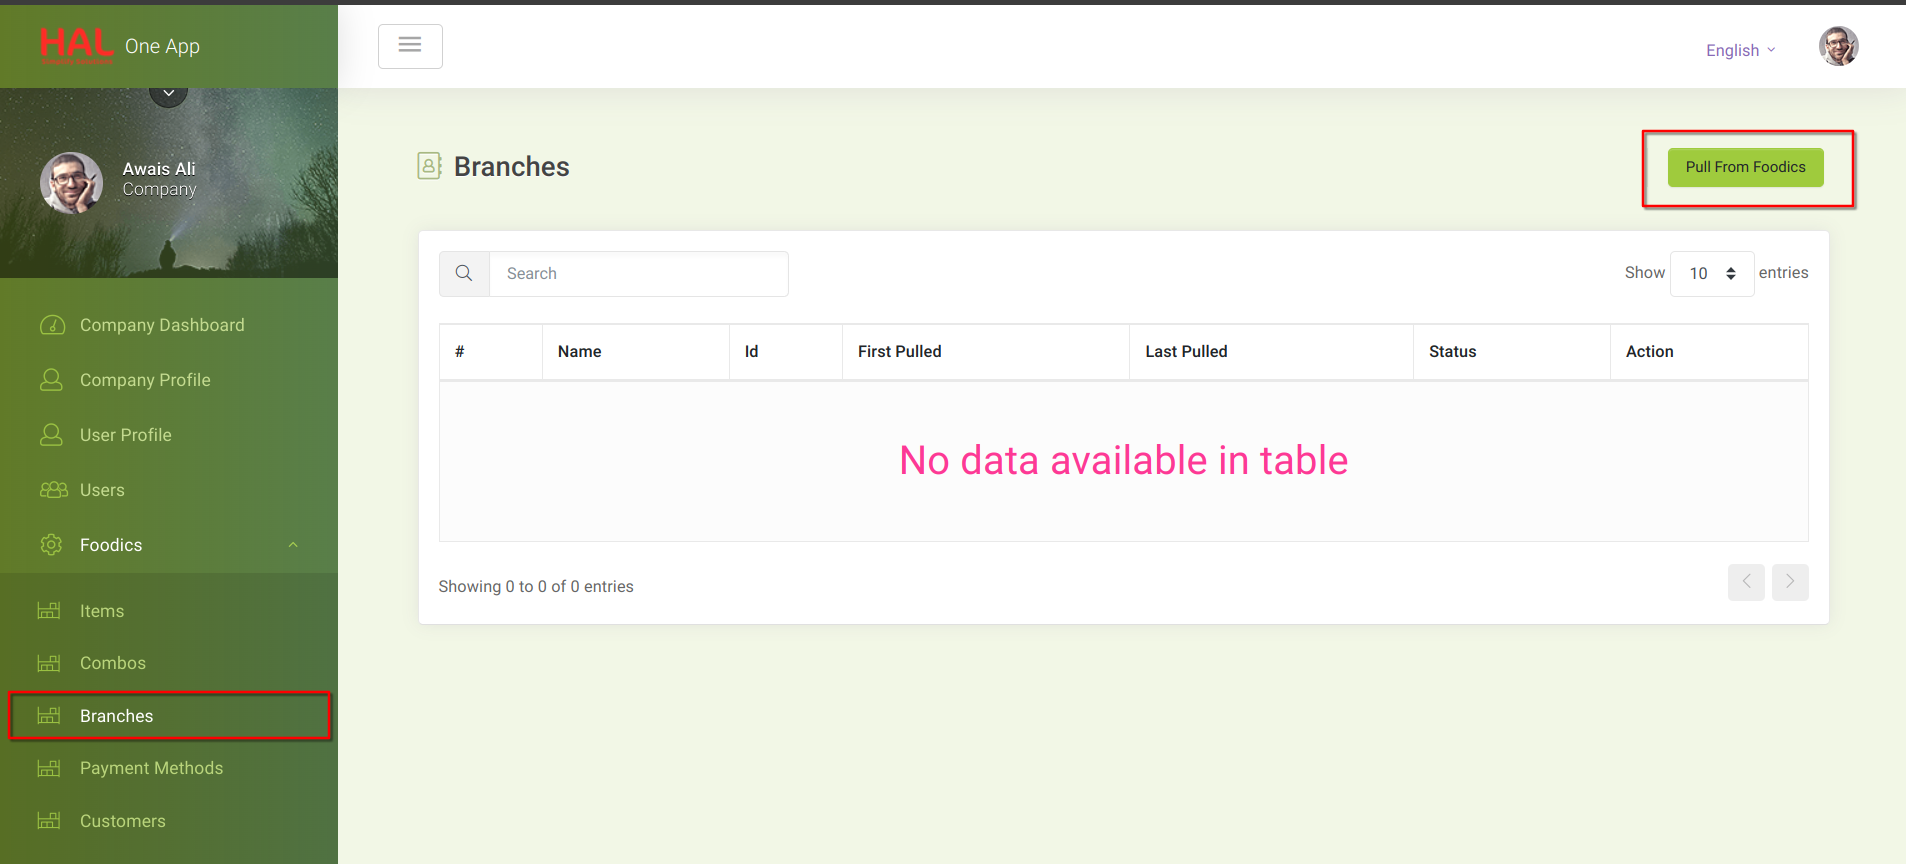
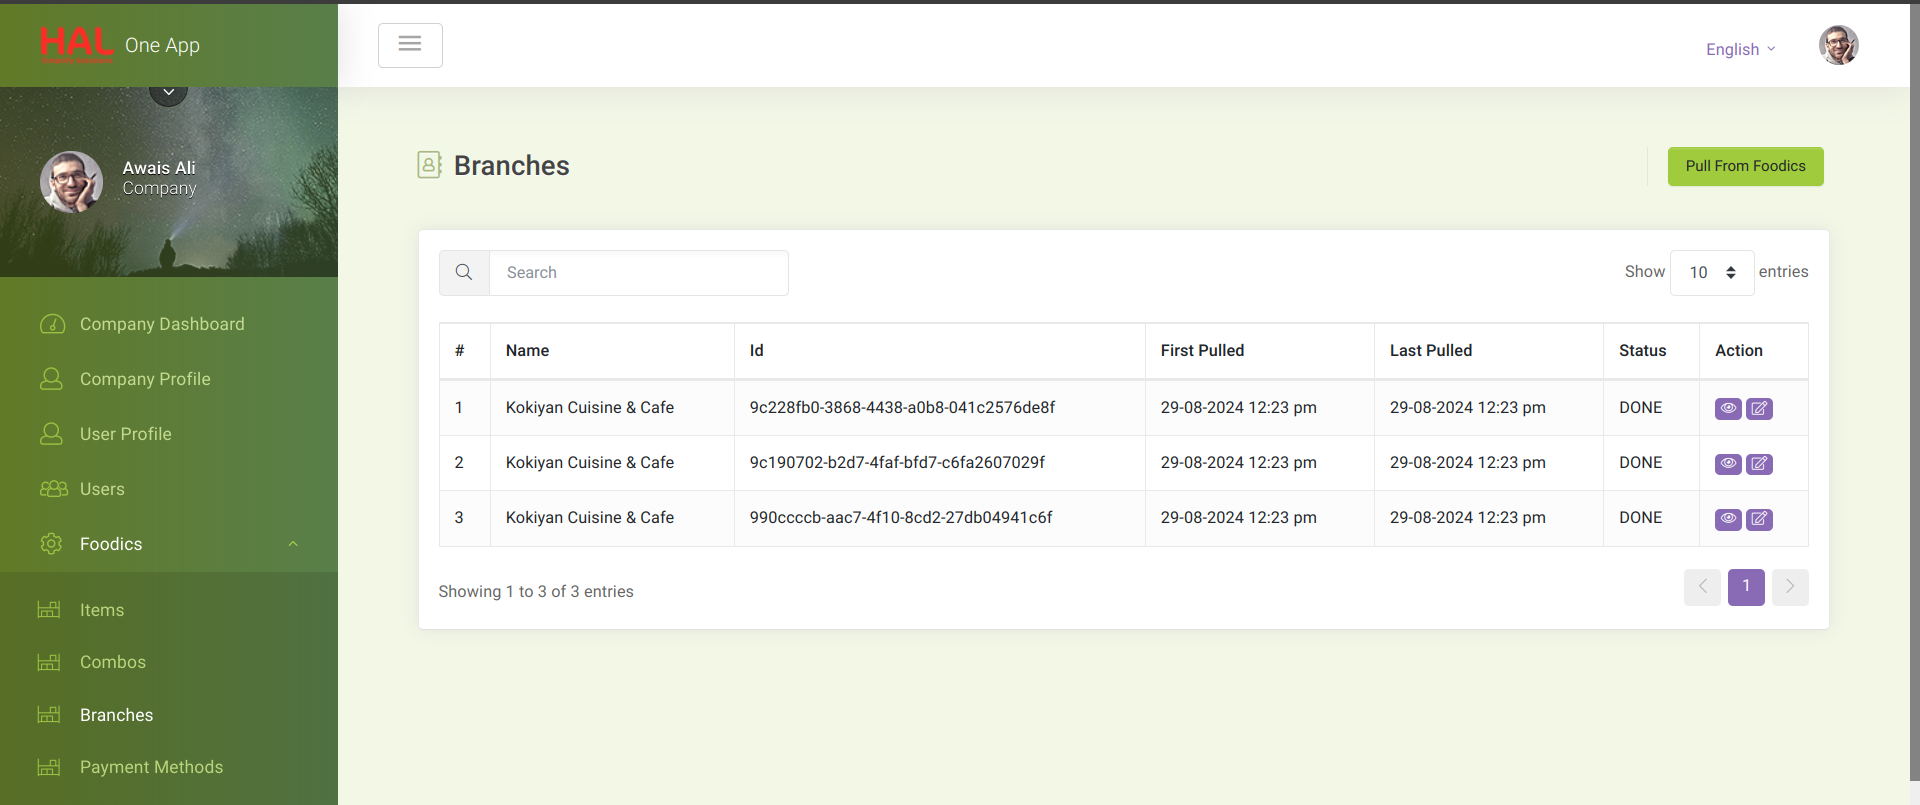
2.5 Pull Branch Data from Foodics
- After logging in with the newly created user, navigate to the Foodics section and select Branches. Click "Pull From Foodics" to fetch the branch data.
2.6 Pull Payment Methods from Foodics
- Navigate to the "Payment Methods" section in OneApp.
- Click "Pull From Foodics" to fetch all payment methods.
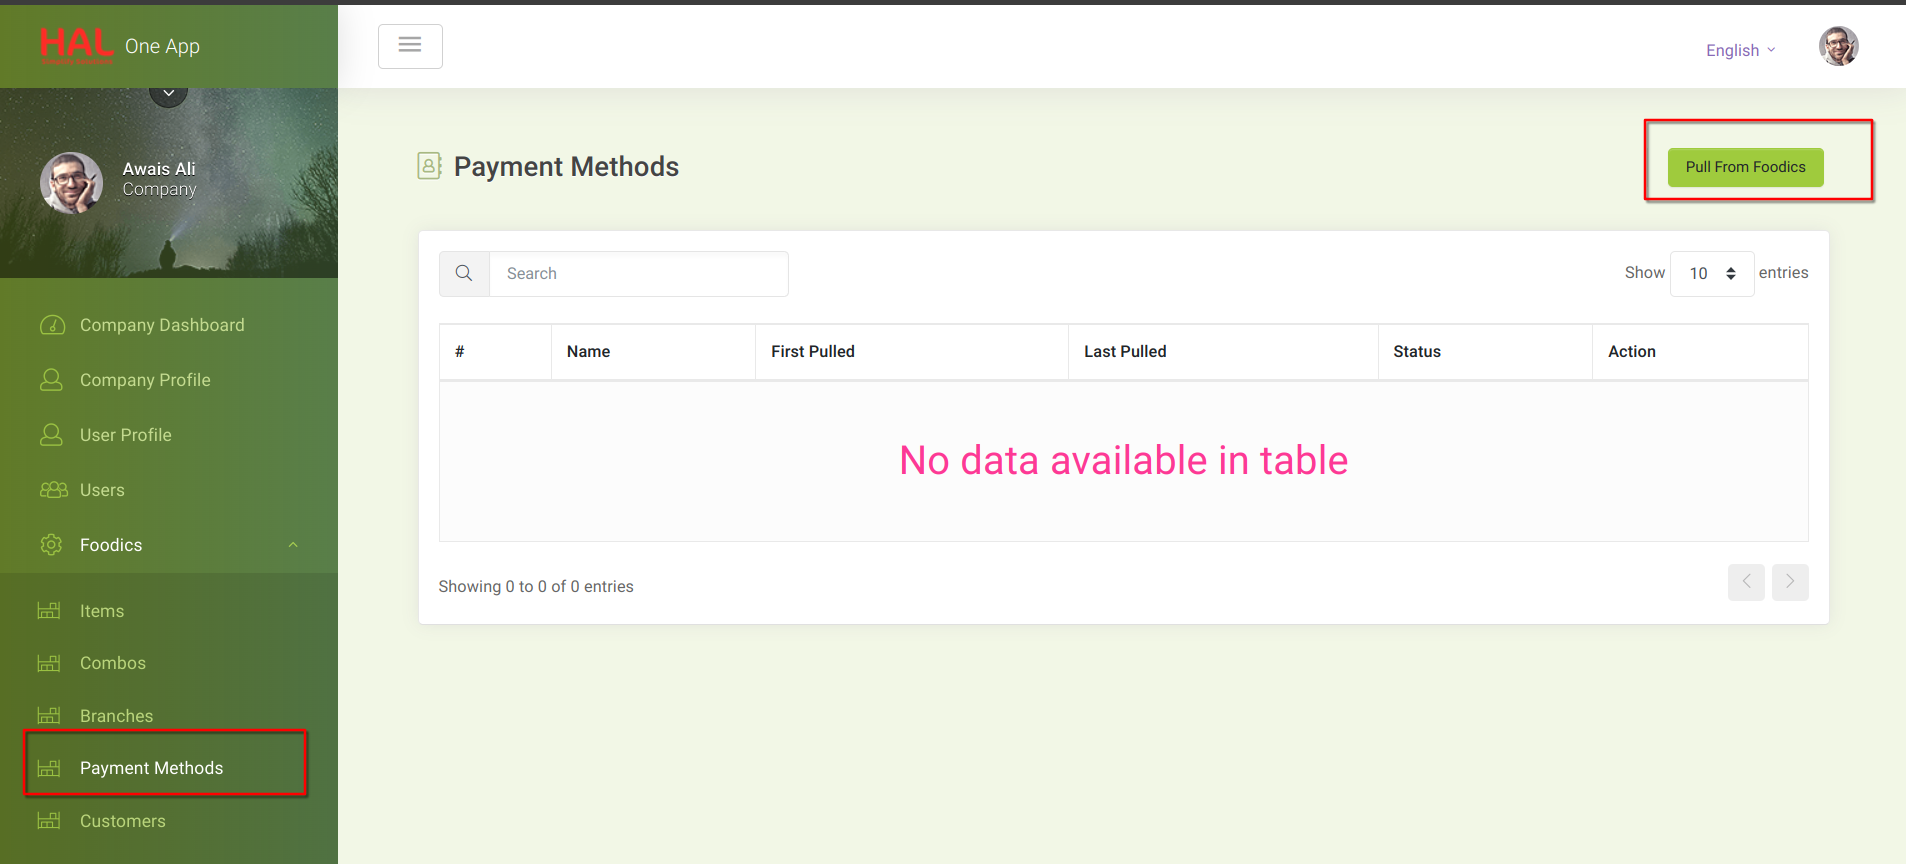
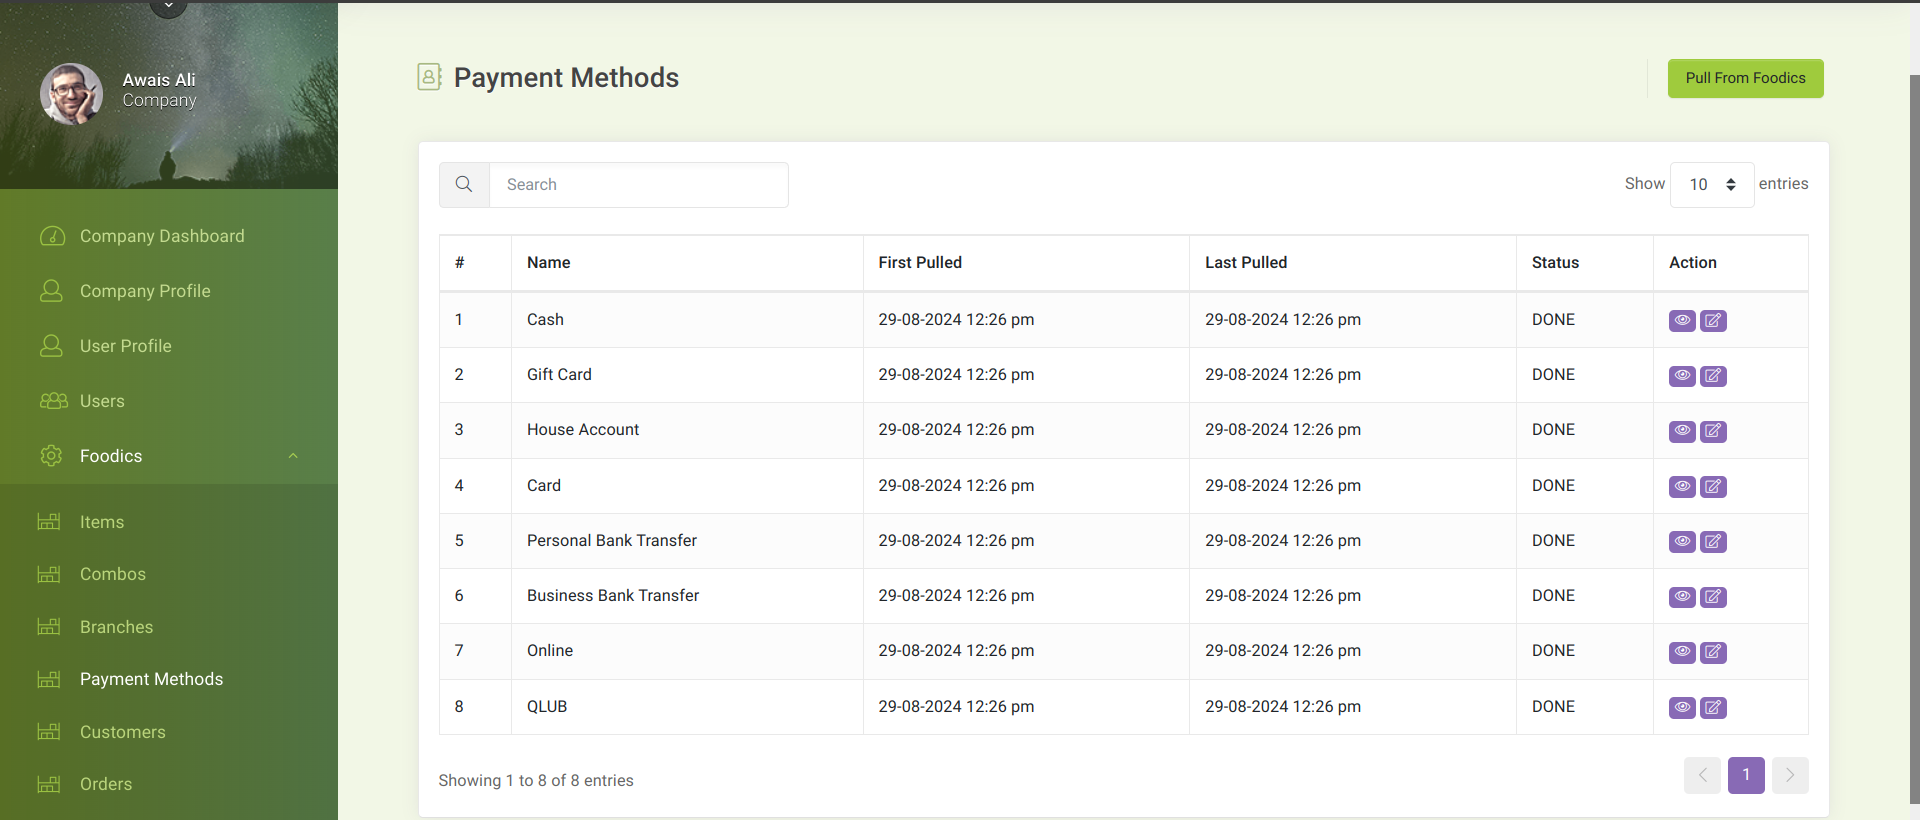
After we pulled branches(OutletMaster) and payment methods(ValPaymentMethods) we have to create the same in the ERP.
3.Set up in our HAL.
In phpMyAdmin, in the customers table of hal_oneapp_dev, insert the following query:
INSERT INTO customers (company_id, foodics_id, api_request, api_response, first_pulled, last_pulled, hal_customer_id, created_at, updated_at, first_pushed, last_pushed, salla_id, zid_id, uuid, status)
VALUES (52, 'Cash Customer(265125)', 'Default Customer', '{"id": "99387a7e-b6fc-4df4-a68b-d0d2f34abcde-24","name": "Cash Customer(265125)","phone": "9876543210","email": null,"gender": null}', NULL, NULL, '', NULL, '2024-03-30 09:37:54', '2024-03-30 12:37:54', '2024-03-30 12:37:54', NULL, NULL, NULL, 'PENDING');
4. Map Branch to Outlet
Create an outlet in the Outlet Manager for the branch in Foodics.
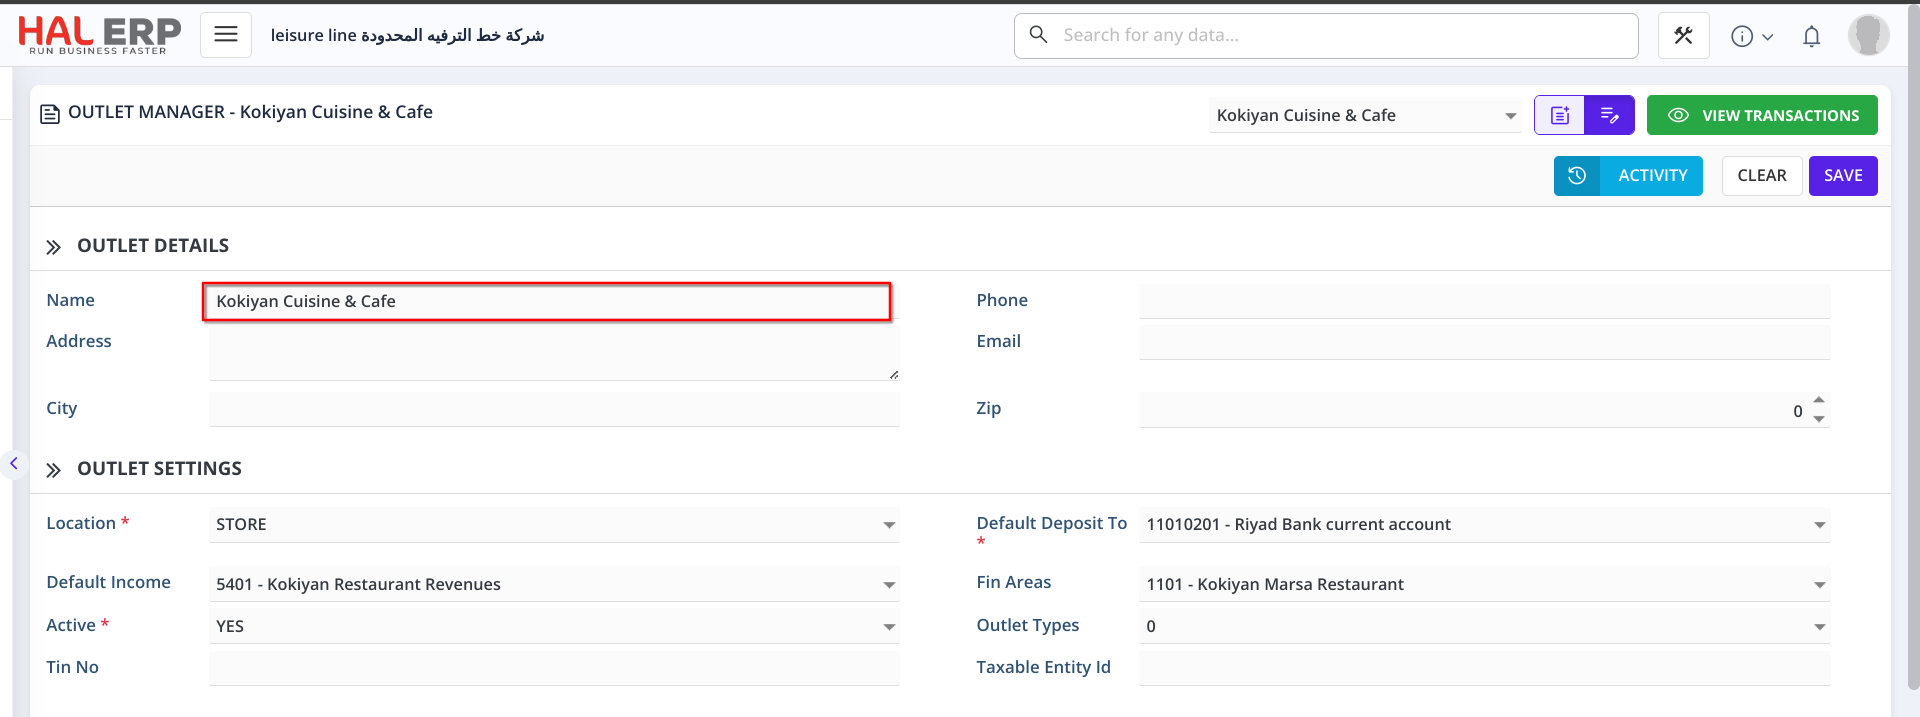
Once Outlet created, Access PHPMyAdmin and Retrieve the Foodics ID for the branch either from foodics acount or oa_sync_outletmaster table and set it in oa_external_id column in outlet_master table to map the branch to the outlet.
Once outlet created update the outlet with following columns
UPDATE outlet_master SET taxgroupdefs_id = 6, outlet_start_date = '2024-07-15', outlet_end_date = '2030-07-14' WHERE id = 1;
5. Map Payment Methods
Create a separate set of payment methods for each Foodics account.
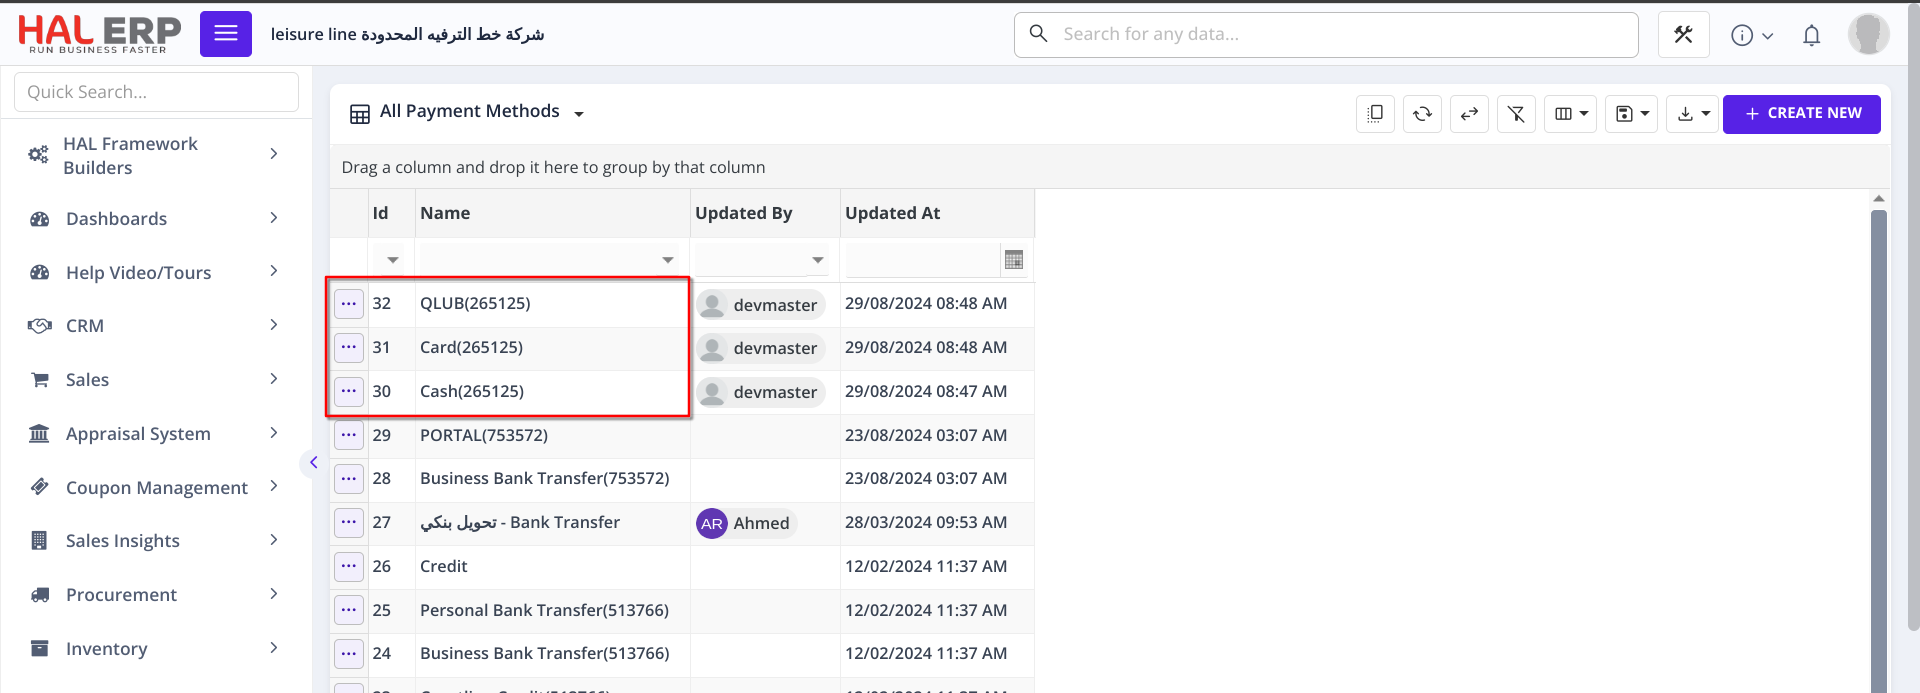
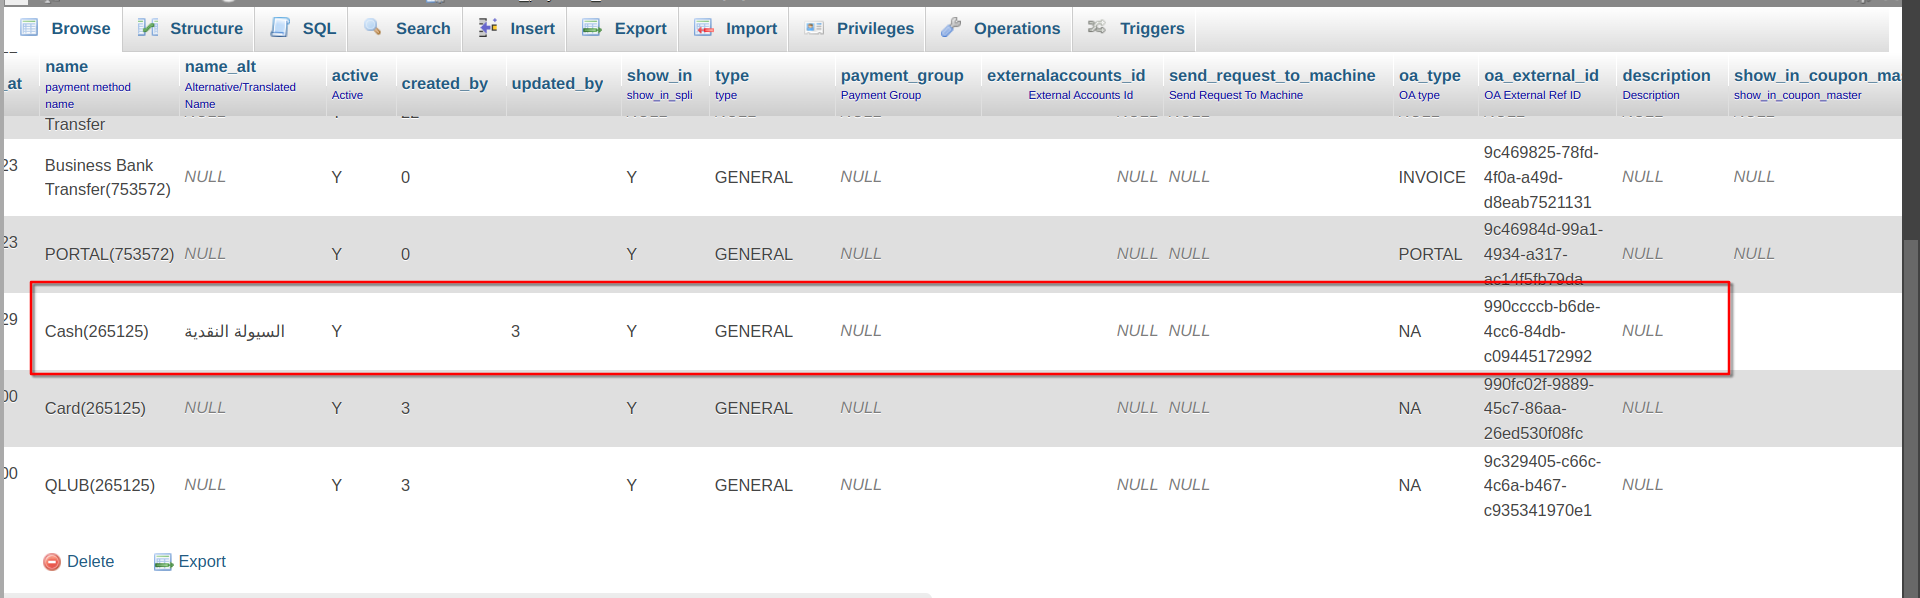
Access phpMyAdmin and navigate to the val_payment_methods table.
In the oa_type column, set the values based on the following mappings:
- Use "INVOICE" to create invoices
- Use "NA" to create sales receipts
- Use "CUSTOM" to create invoices with tags(We have to handle in code)
- Use "PORTAL" to create invoices which has payment method (Portal) or Tags
Refer to the payment method types in the link: Payment Method Types
Ensure that the oa_external_id column is updated with the Foodics ID corresponding to the payment methods and set show_in_split_payments to "Y."
6. Set up charges and the default customer in HAL.
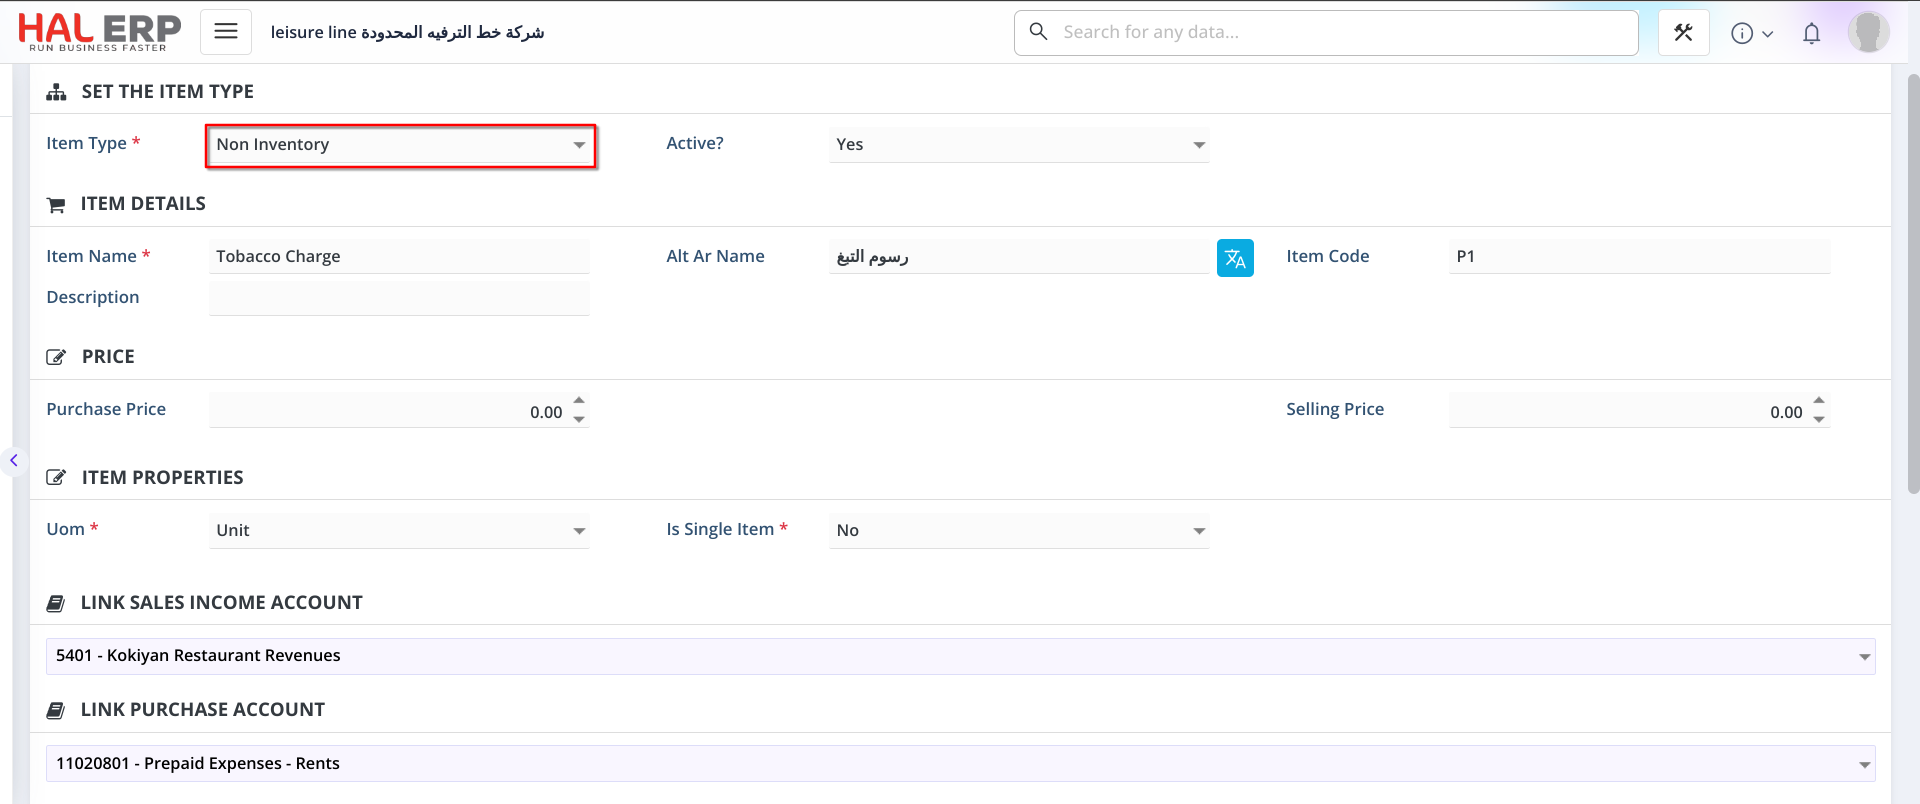
Create each charge as a non-inventory item in HAL.
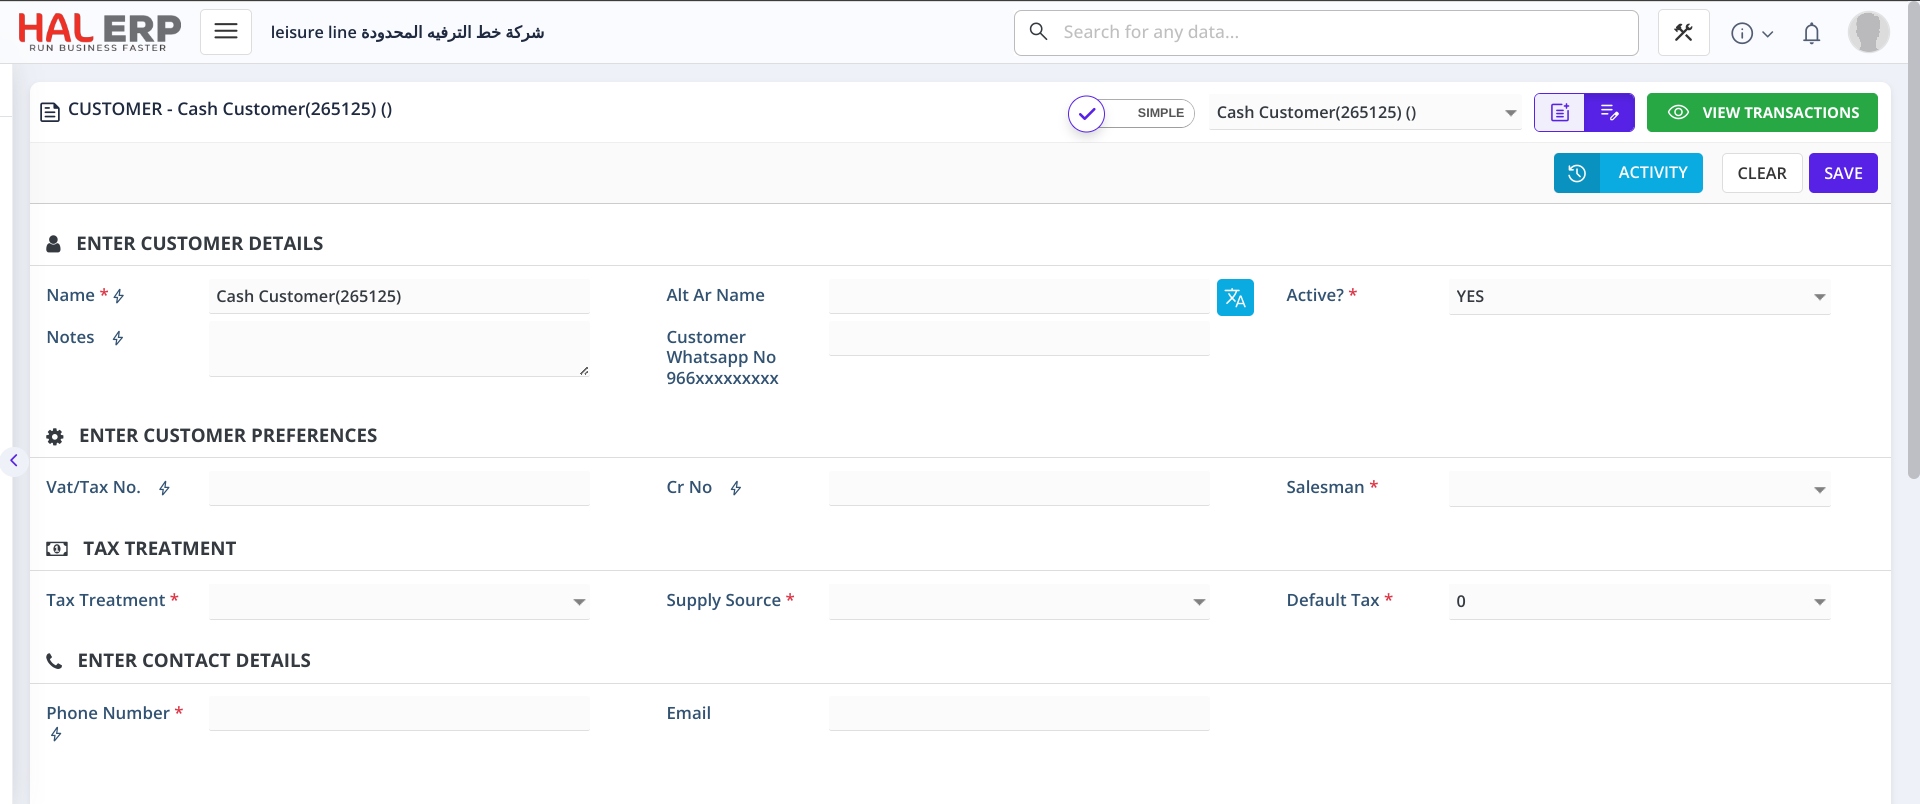
Create a default customer for Foodics account in HAL.
7.Sync Orders from One APP
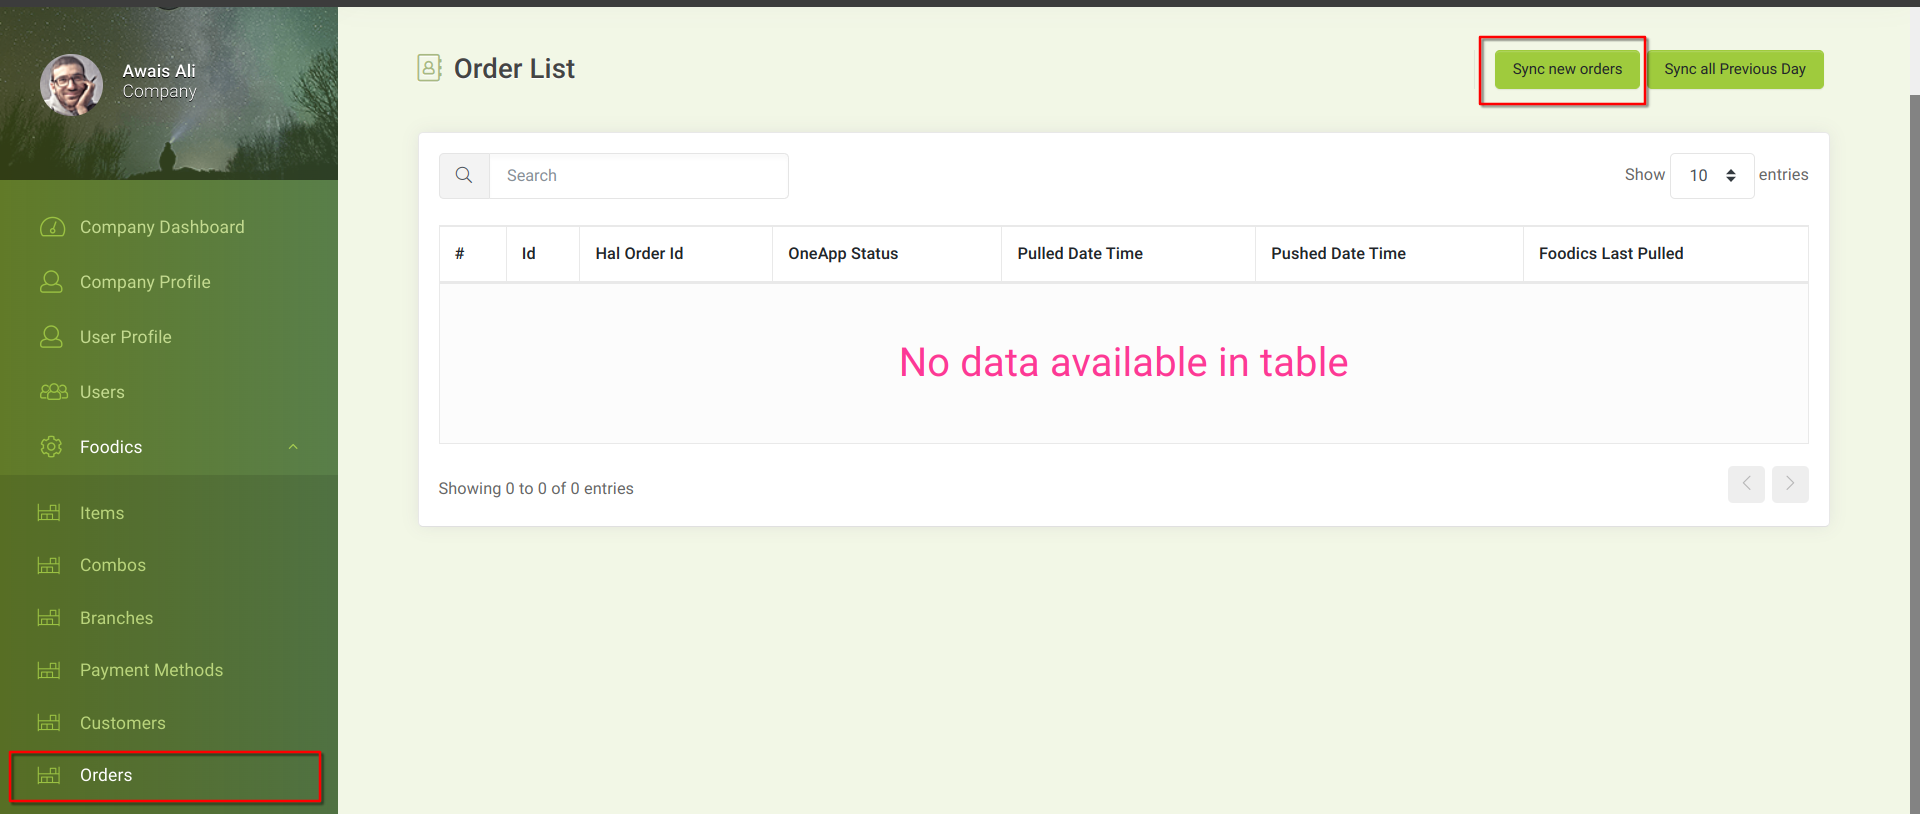
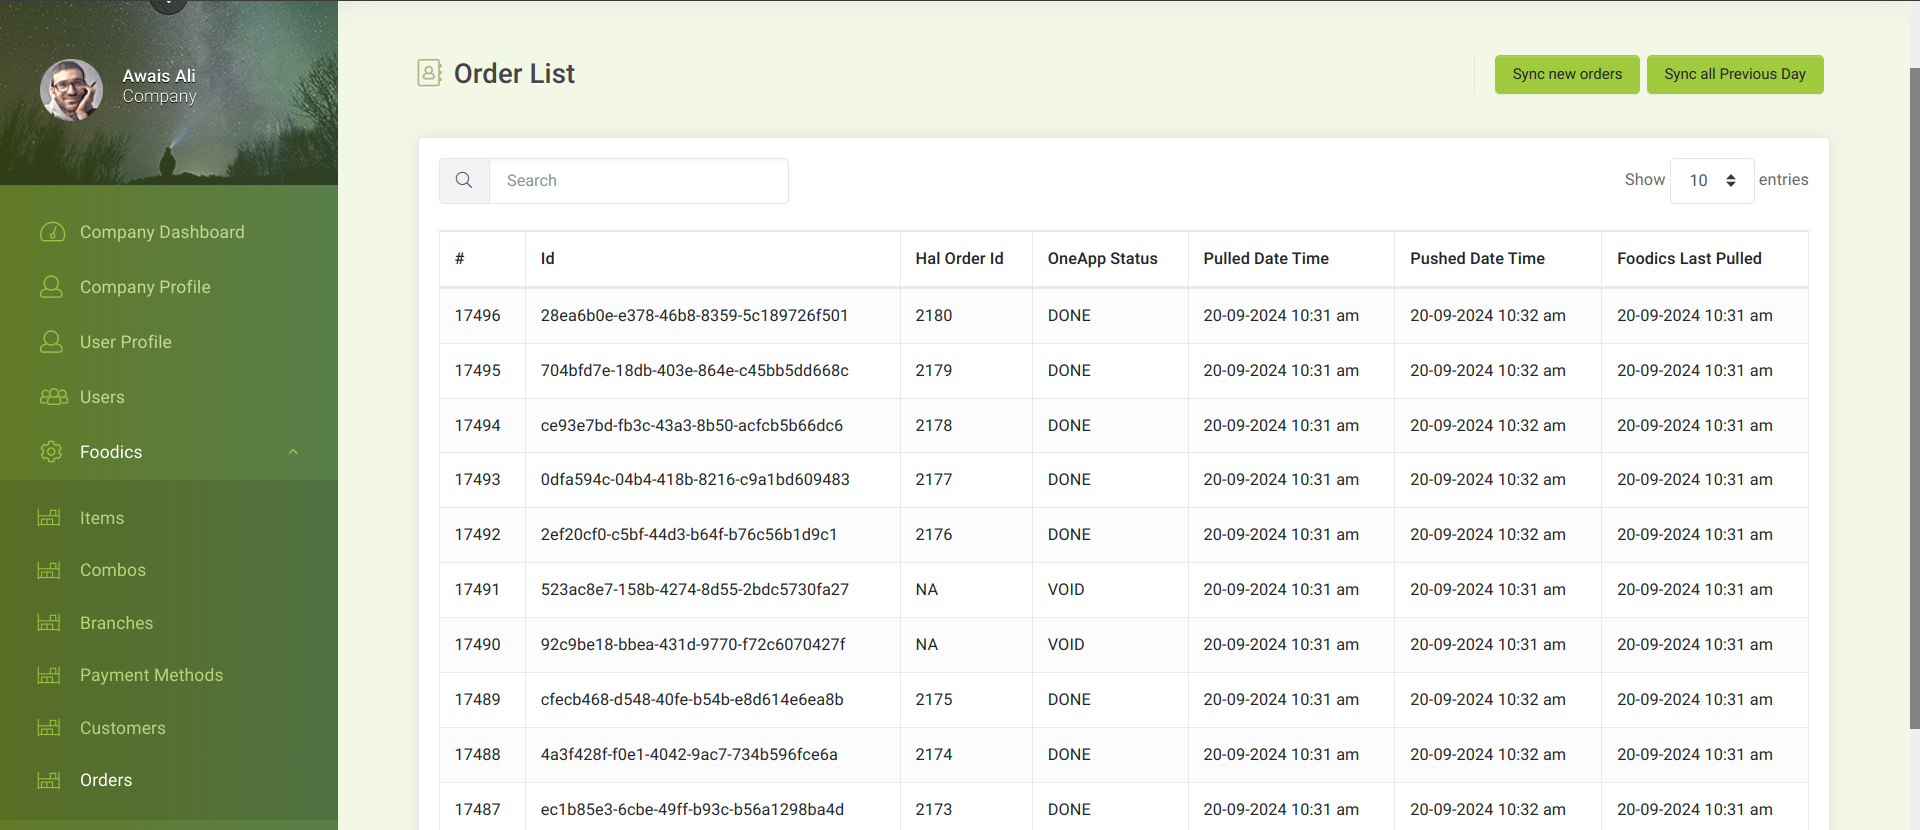
- In the OneApp, navigate to the Orders section and click "Sync New Orders" to fetch all orders from Foodics to OneApp.
8. Run Command
-
Run the following command to create transaction in HAL
php artisan hal_order:sync --from-code --only=<tenant name>