One Step Registration
One Step Registration includes
- Student Details
- Sibling Details
- Parent Details
- Document Validation
- Student Evaluation
- Student Selection
- Photo upload
ONE STEP REGISTRATION
To create a new admission go to Admission--->One step registration--->Create New
STUDENT WITHOUT SIBLINGS (FIRST STUDENT OF THE FAMILY)
- Create a student without selecting sibling
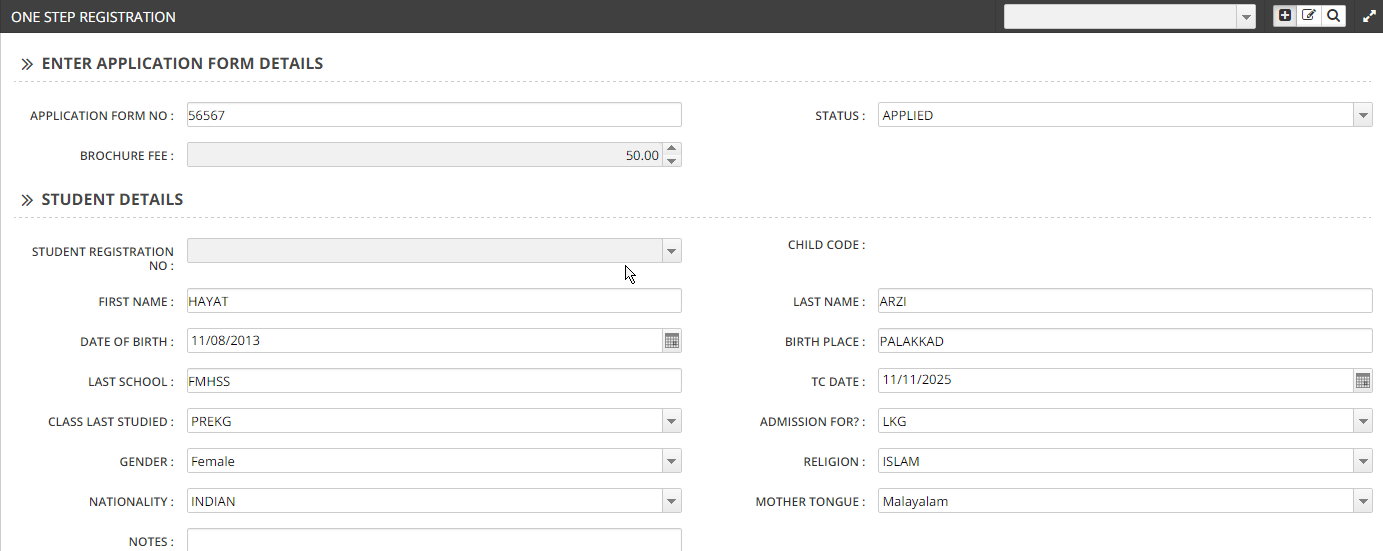
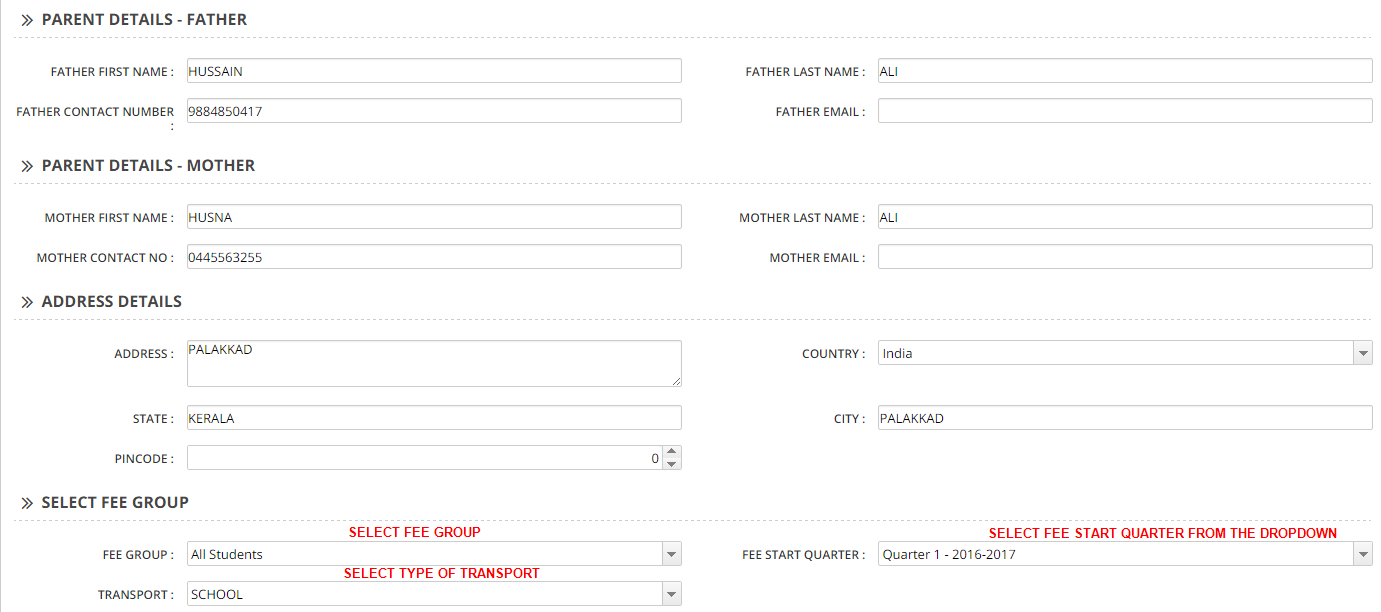
- Enter necessary details.
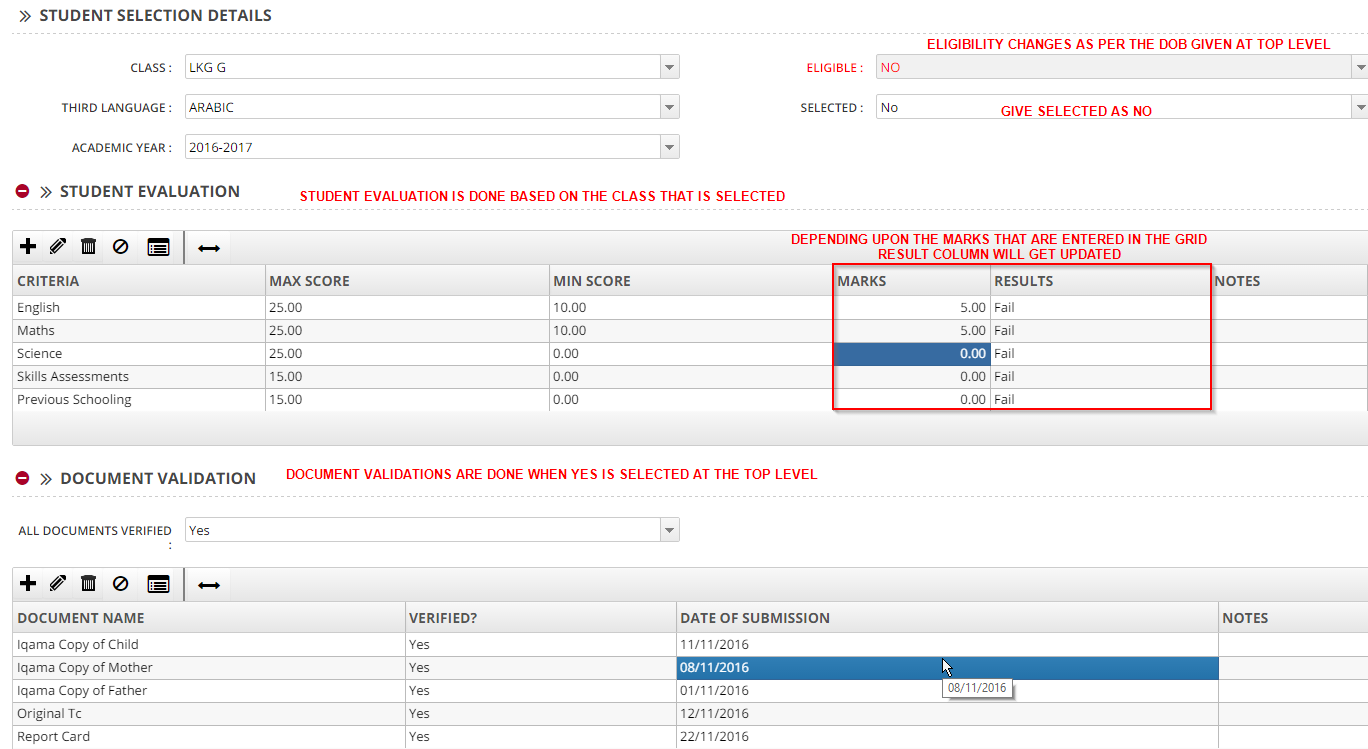
- Also the evaluation of the student is conducted and the marks are entered accordingly and
- Update the documents that were validated. You can select YES at top level to mark all documents as received.
ELIGIBILITY:
The eligibility criteria will already be configured in the system as per your schools requirement. Whenever the student's Date of Birth is updated, the Eligible dropdown will be updated to show if the student is eligible or not for the selected class. This data will also be available in the report. The school still has the ability to go ahead with the admission if needed
For example, we will keep Selected field as NO. The Eligibility will change according to the Date of Birth entered at the top level. The below image will give you more details
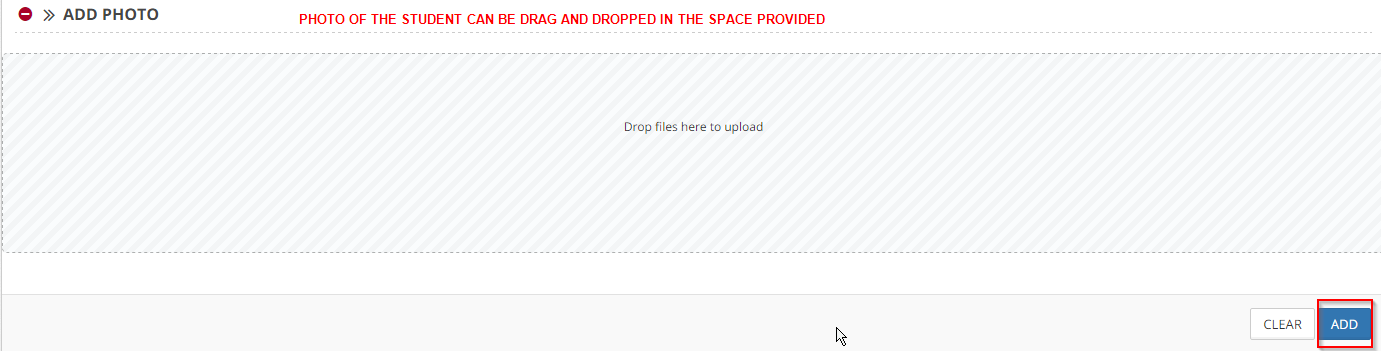
Click on Add and the new student details will be uploaded.
MARKING A STUDENT AS SELECTED
Once the Add button is clicked, you can see the generated Reference Number at the top of the page.
Click on that number to view or edit the student details. You can also search for a student in the transaction screen and double click to open that student admission details in Edit mode.
Once opened, you can choose the section if needed and mark Selected as Yes and save. This will do all the preliminary admission and will make the student available in the Student Profile screen.
Note: New students when selected appear in the Student Profile screen, however, their status would TBD and they will not have any GR No. More details on that can be found below.
ADMISSION NUMBER
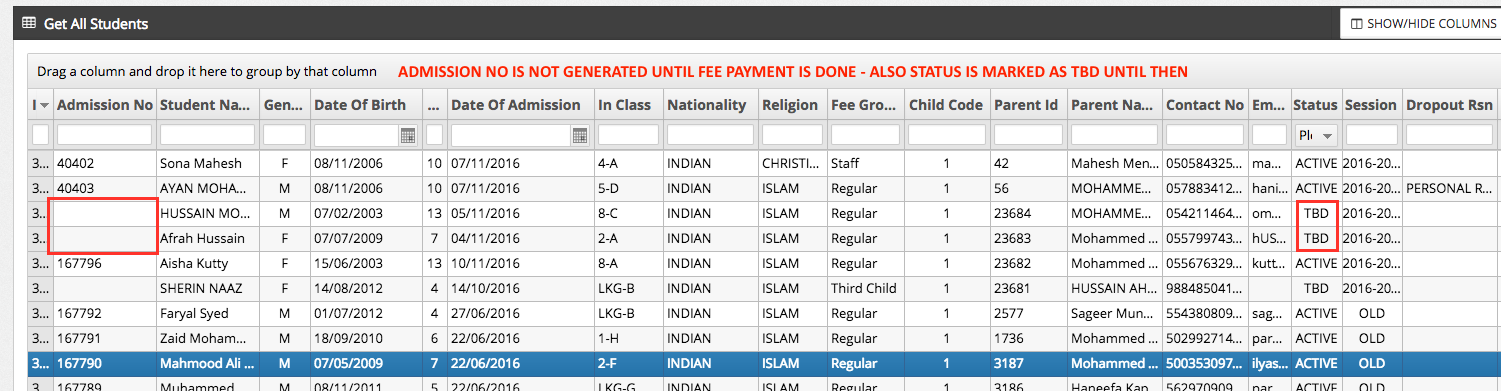
Before fee payment Admission number will not be generated to a student. New students when selected appear in the Student Profile screen, however, their status would TBD and they will not have any GR No. Once the student makes any fee payment, his admission process completes and a GR No/Admission number is generated for him and assigned to him. He is now marked as an ACTIVE student.
Until any fee payment is done, the student can be deselected from the One Step registration. If you have made any mistakes, the student can be deselected, details can be updated and selected again. Once the fee payment is done and admission completes, student management will happen from the Student Profile screen.
In the screenshot below, the new students who have not paid the fee but whose details are uploaded using One Step Registration are highlighted.
ADMISSION NUMBER GENERATION - POST FEE PAYMENT
Fee payment to a new student is done through Fee--> Fee Payment-->Create New-->Select the student-->Fill the necessary details-->Click on Add.
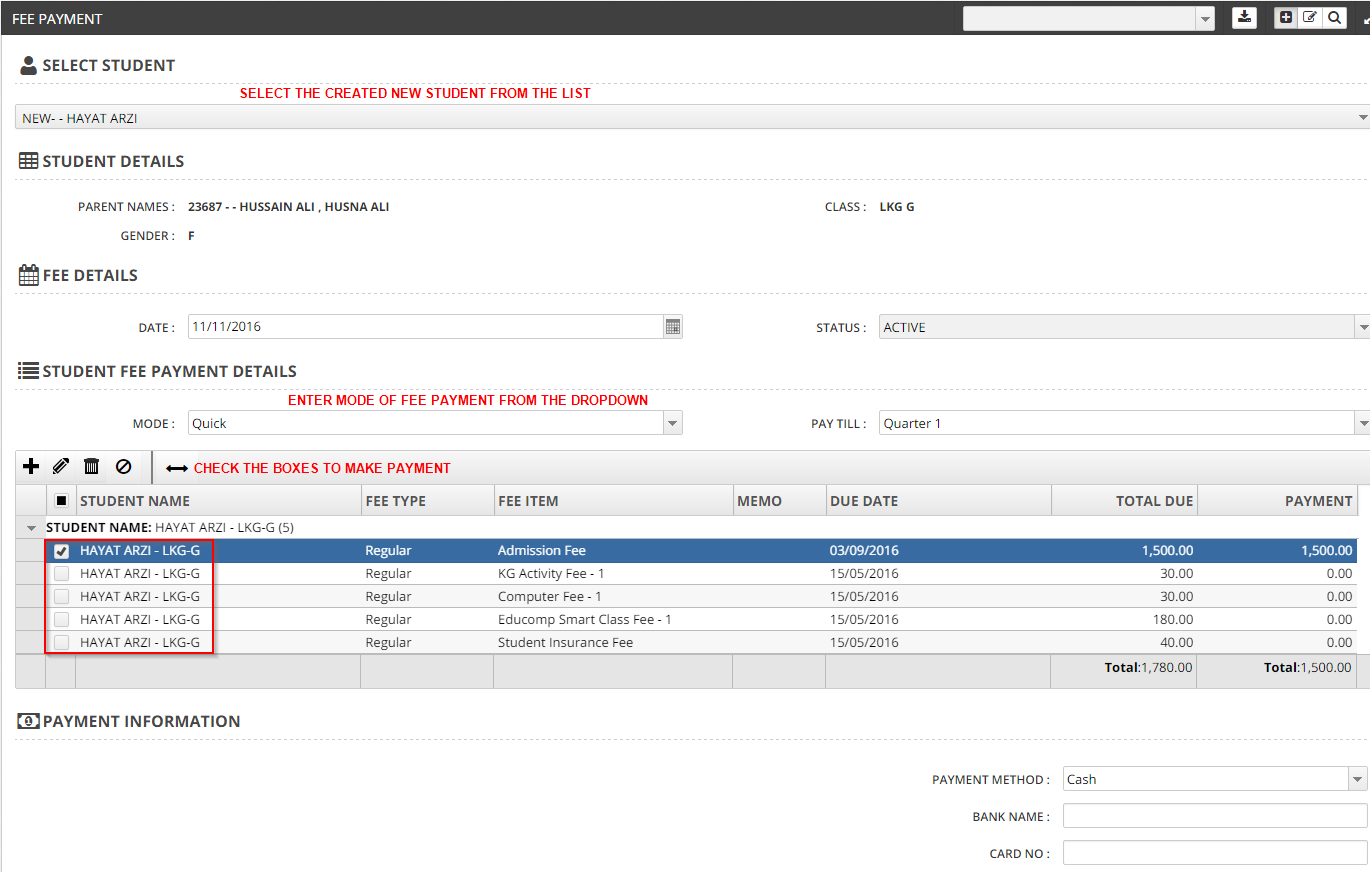

Once the fee is paid in Fee Payment screen, admission number for that particular student will be generated immediately and he is then marked as ACTIVE completing his admission process as shown above.
HOW TO CHECK WHETHER A STUDENT HAS PAID FEE?
Go to Fee Reports-->Fee payment by students-->Enter the name or GR no to search for the student.
Only if the student has paid the fee, his/her name will be found in this Report. If the result is not shown when searched by Receipt no. or GR No. or Student Name, it means that the student has not paid any fee.

AFTER FEE PAYMENT - STUDENT MANAGEMENT DONE FROM STUDENT PROFILE
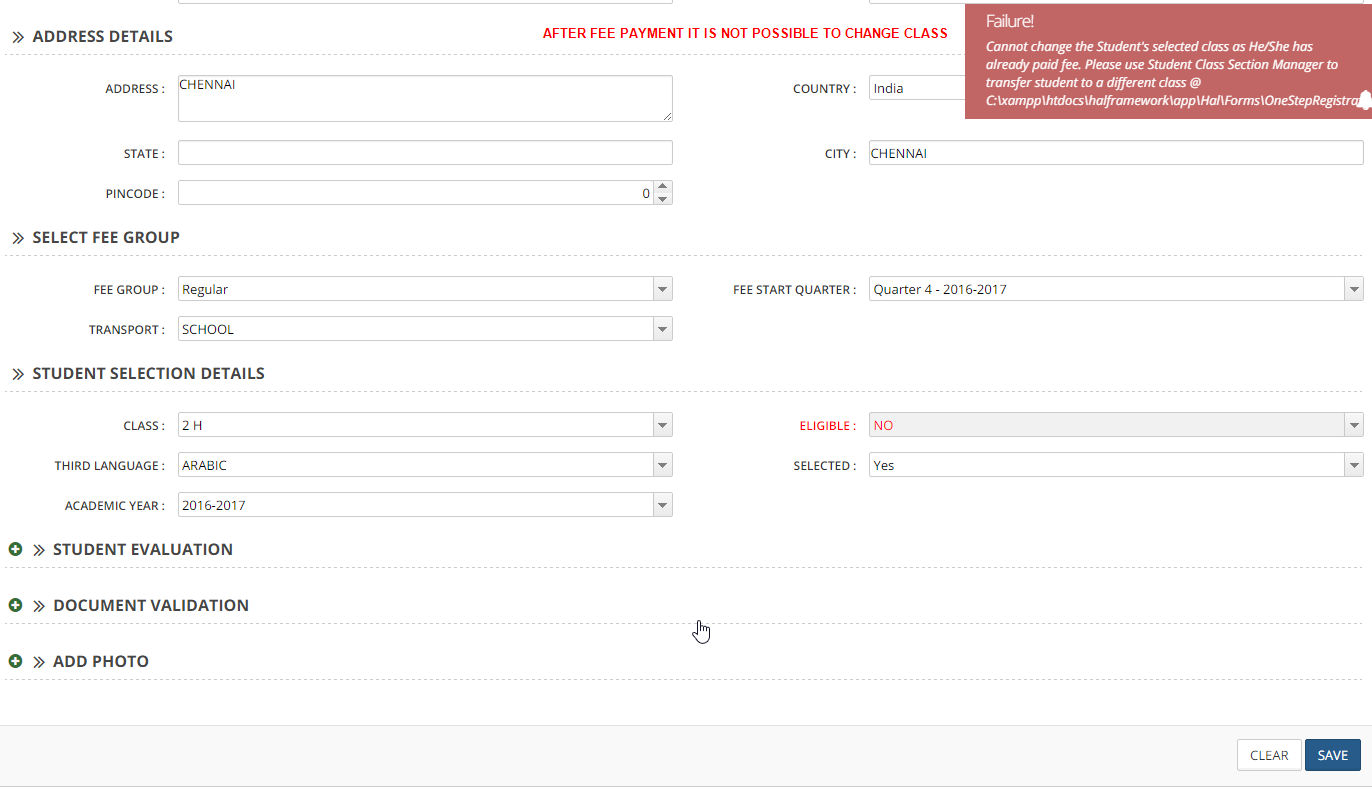
Once Fee Payment is done and the admission process completes all student management would happen from the Student Profile Screen. Eg, if you made admission to a wrong class and the student has paid the fee, you need to correct it from the Student Profile screen. Editing the class from the One Step Registration screen would give the below error.
Student Profile screen would be a single place where you will manage all information about the student once his admission completes.