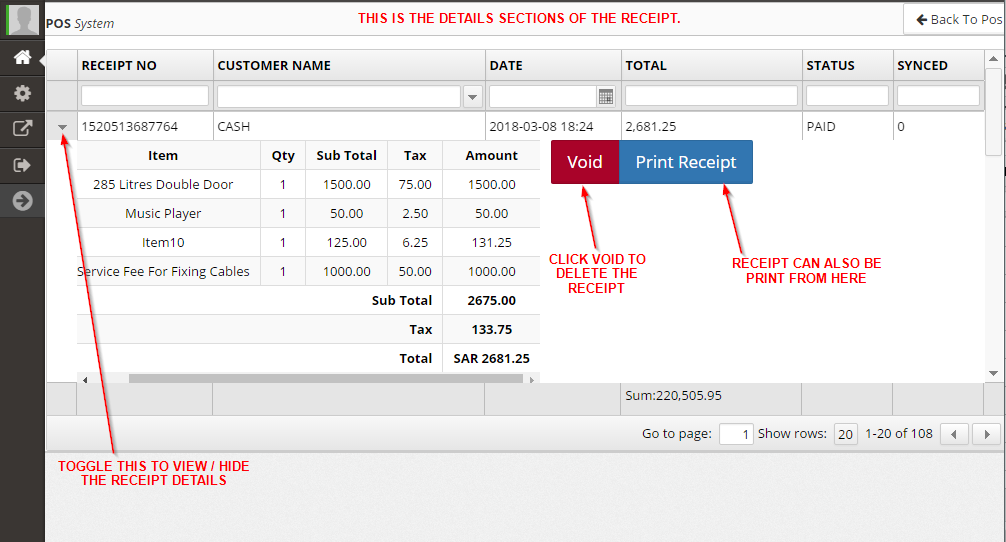
The following are the steps to be followed in order to use the HAL POS.
Initial/First time setup would require the following to be done.
- Create Inventory Locations - If dealing with Inventory
- Create Users (to Assign to Point Of Sale Store)
- Configure Point Of Sale Store
Additionally, master data setup would require
- Creating Items
- Creating Customers
- Create Item Receipts - To receive items in stock
Inventory Locations:
To Know the steps for Creating Inventory Stores, Click Here
Create Items:
To Know the steps for Creating new Items, Click Here
Create Vendors:
To Know the steps for Creating a new Vendor, Click Here
Create Item Receipts:
For Receiving the items in Inventory and raising the stock in hand, Items Receipts is Created. To Know the steps for Creating Item Receipts, Click Here
Create Customers:
To Know the steps for Creating Customers, Click Here
Create User:
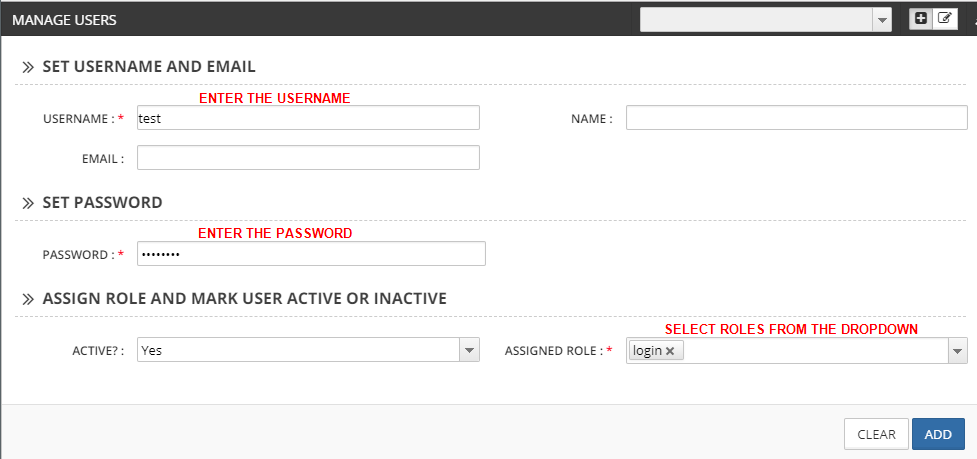
To Create a new User, Click User Management -> Manage User Accounts, Click Create New
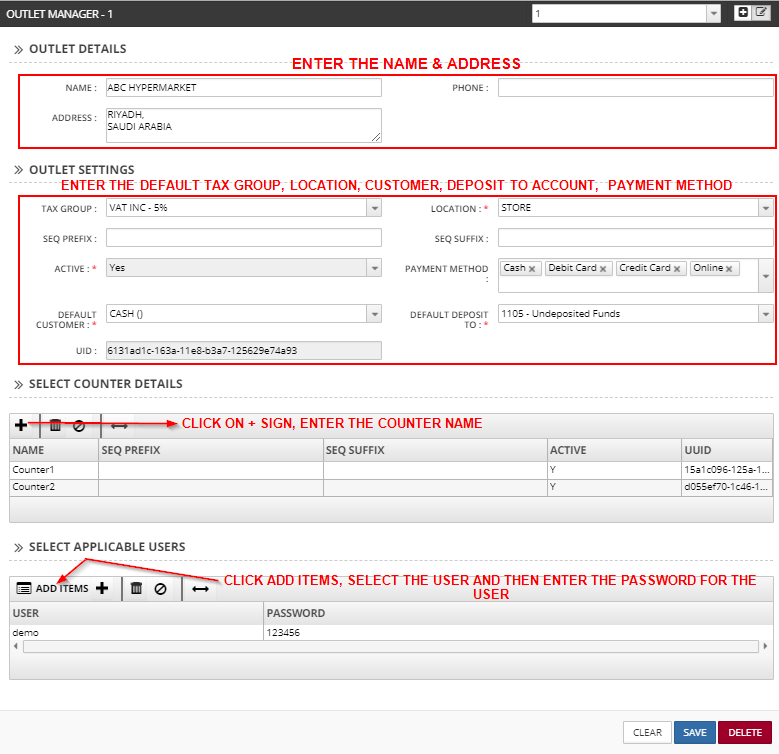
Outlet Master: Create a new Outlet/Store
HAL POS:-
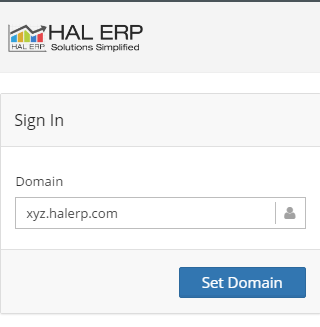
Setting the Domain:
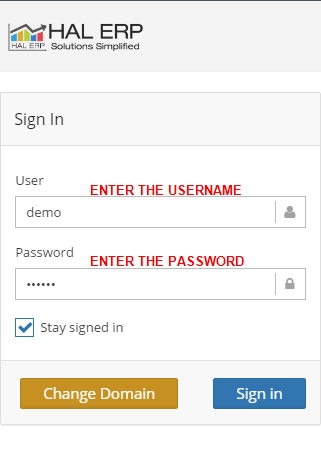
Signing In:
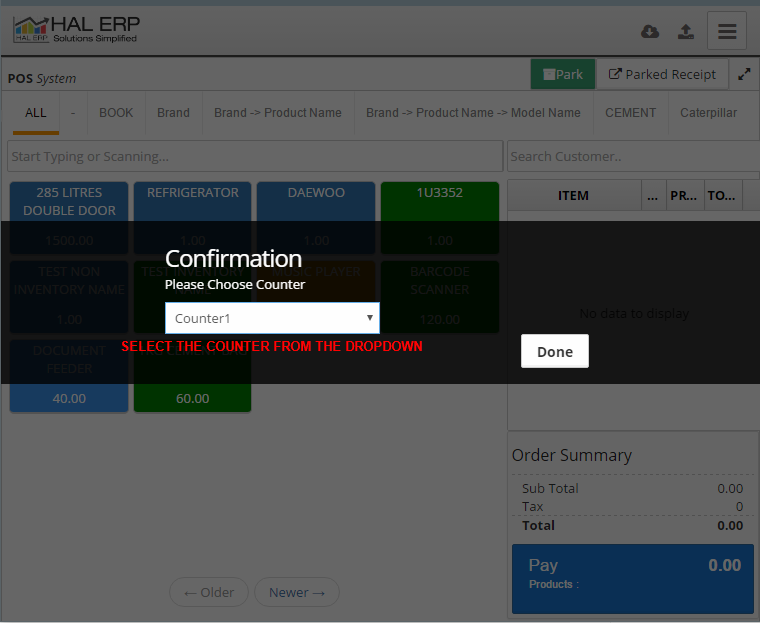
Selecting the Counter:
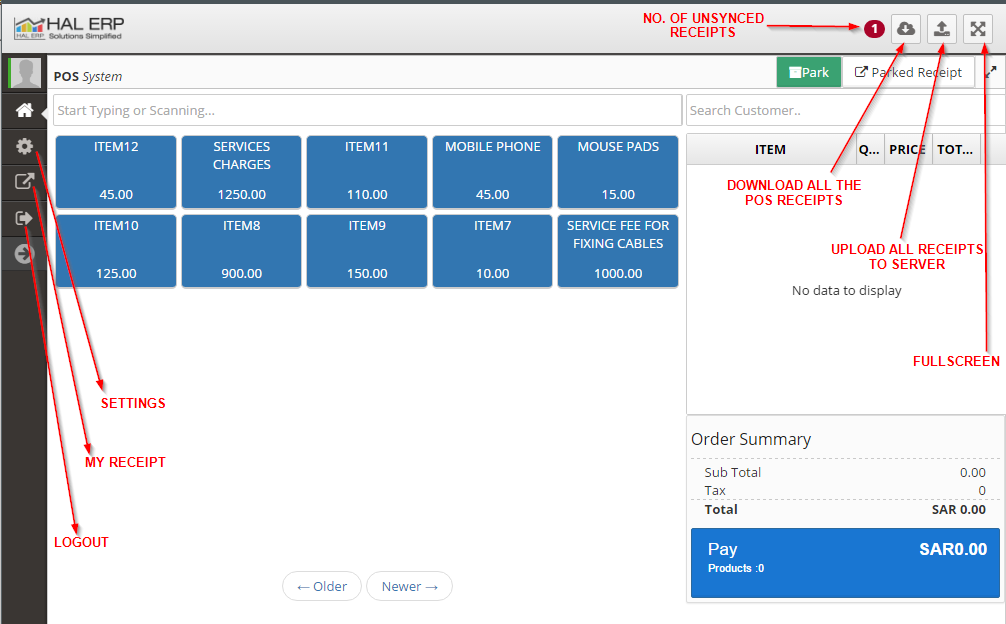
POS Layout
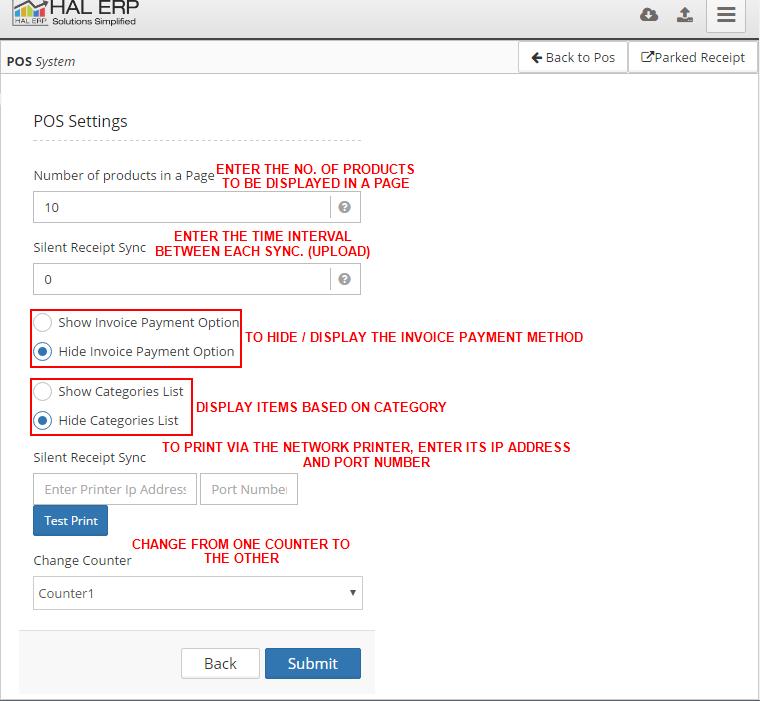
HAL POS Settings:
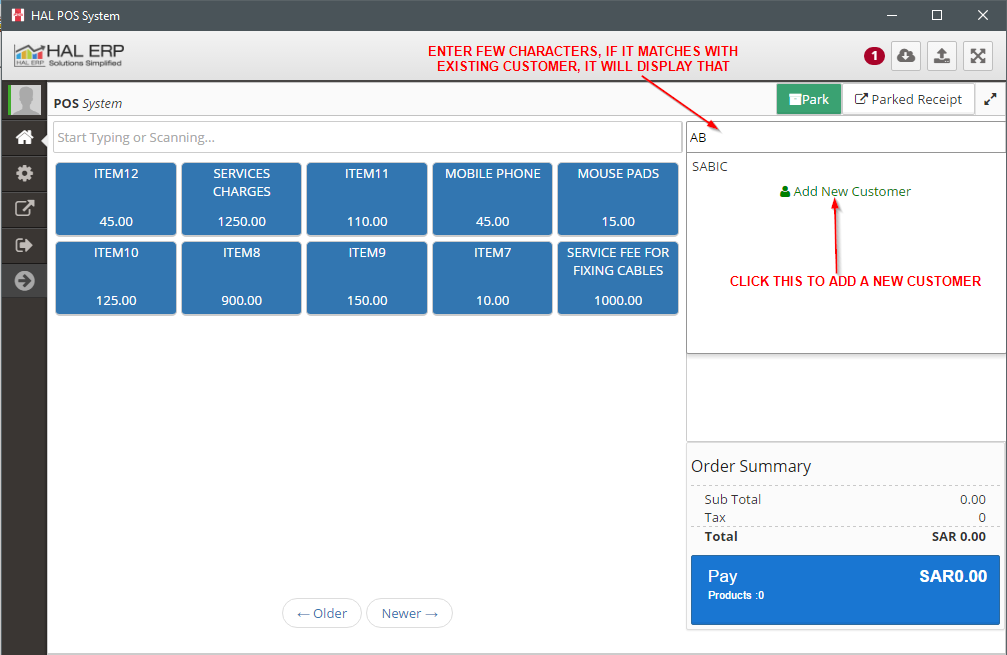
Adding Customer To A Sale
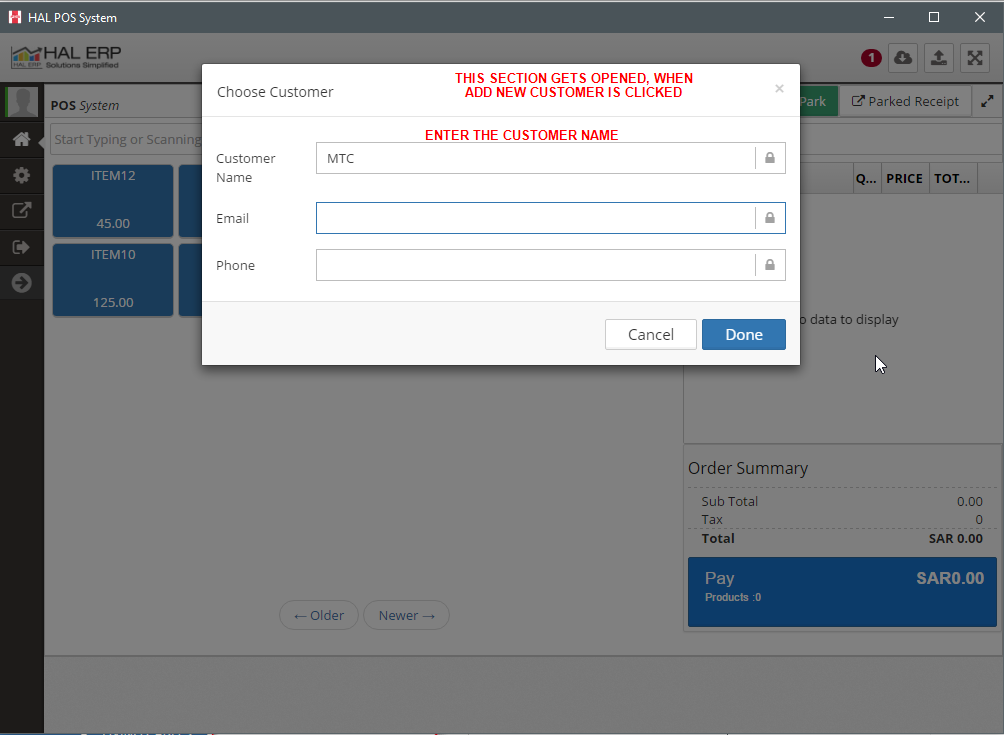
Create a New Customer During Sale:
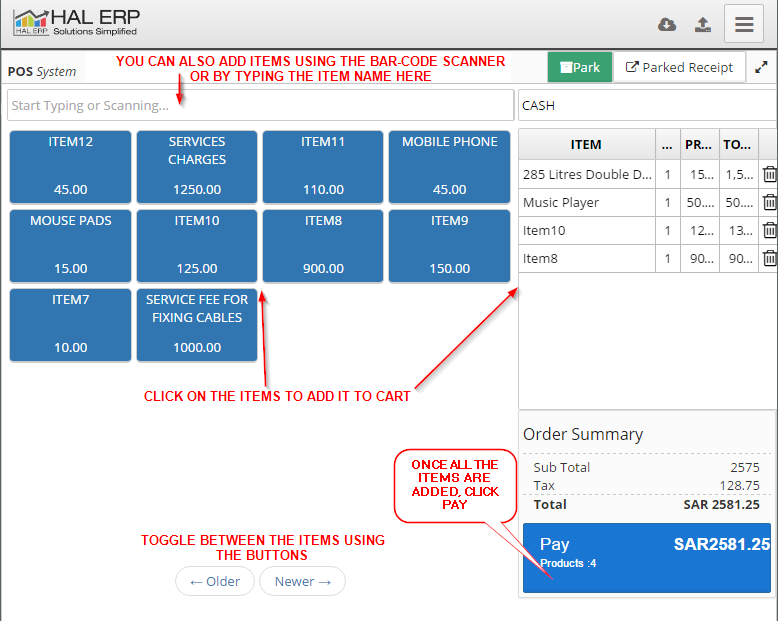
Making A Sale:
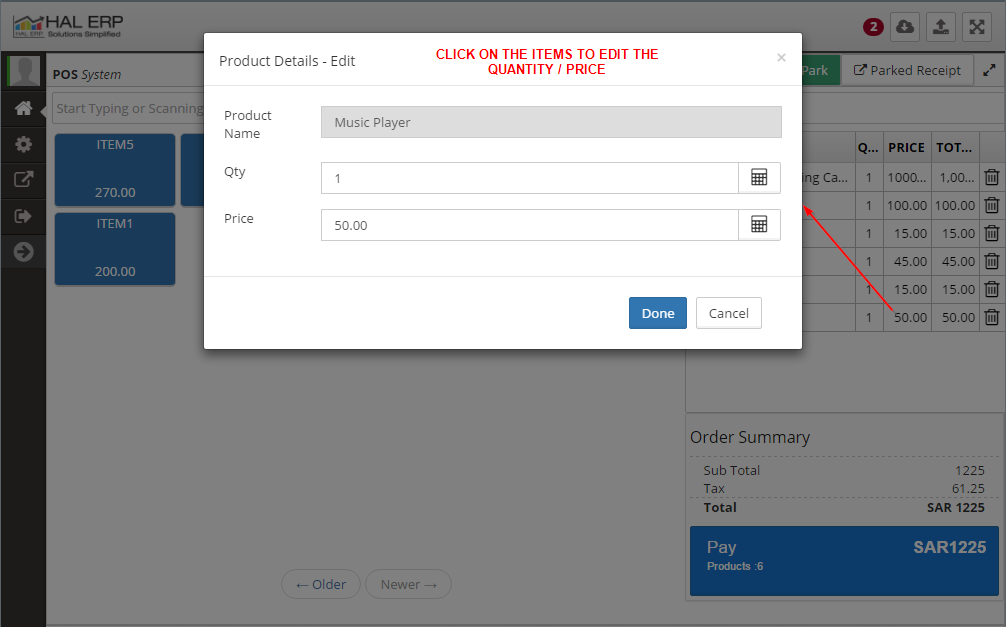
Editing the Quantity / Price in Cart:
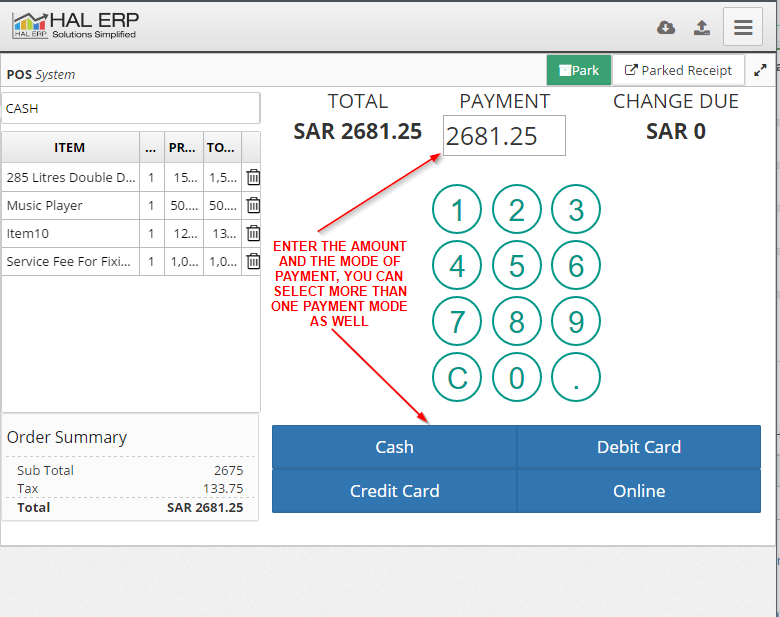
Entering Payment Information:
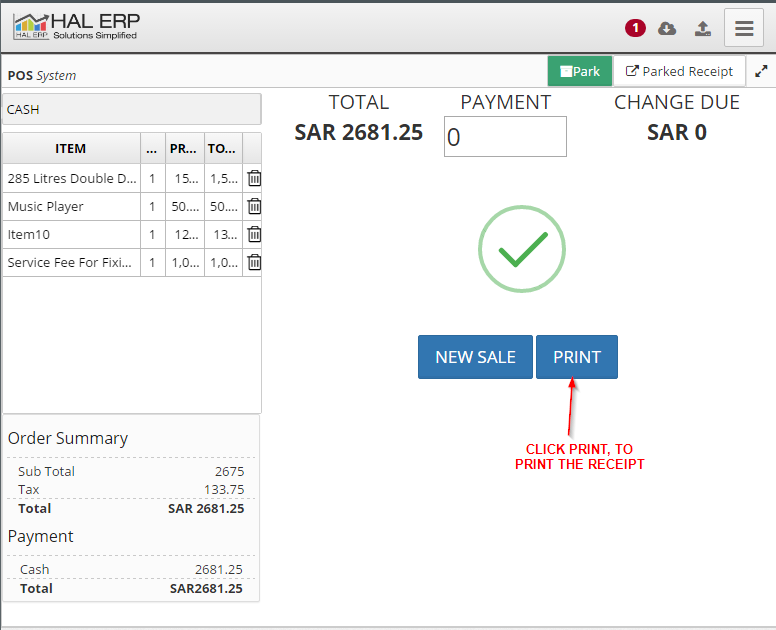
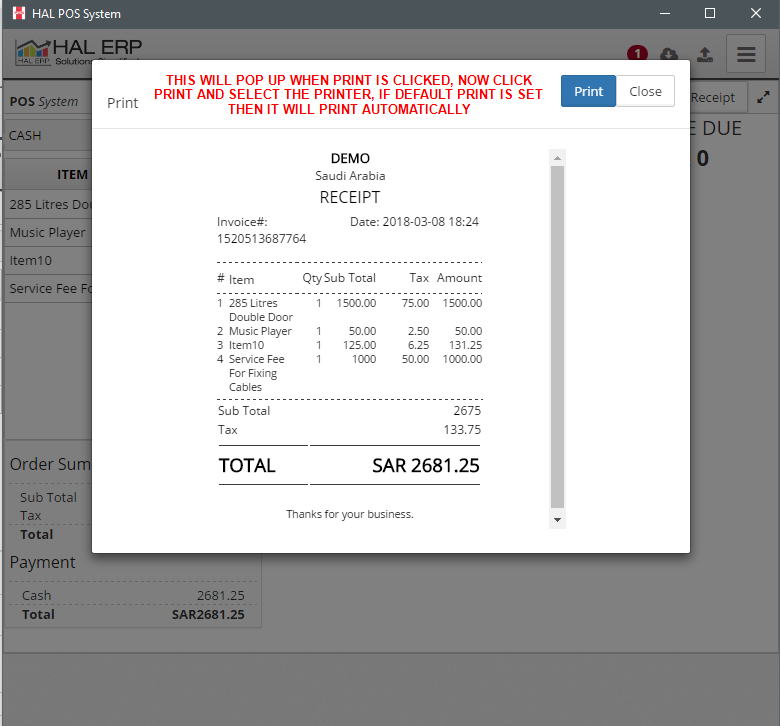
Printing of Receipt:
View All Sales Transactions Done On The POS
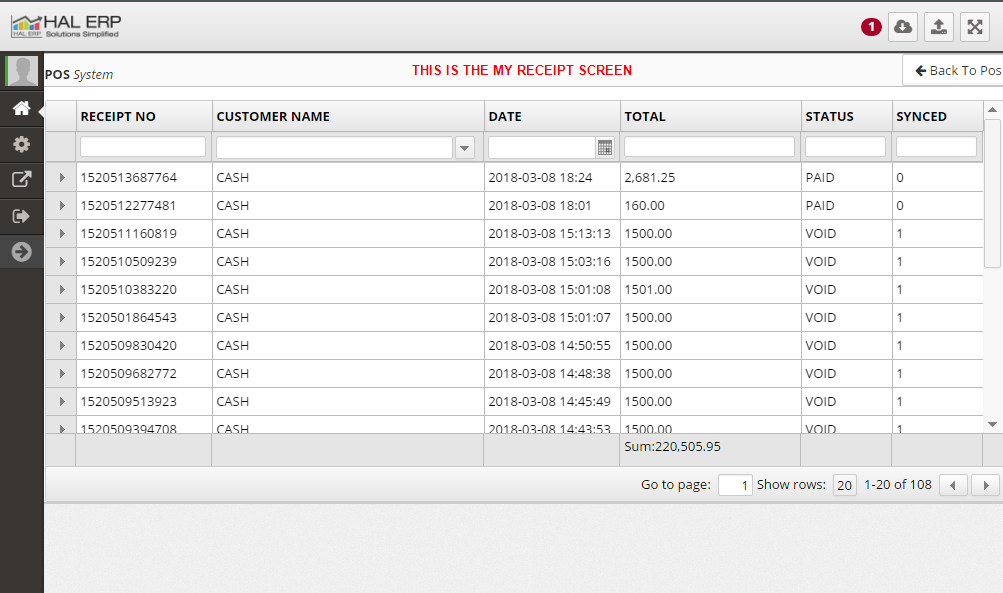
Viewing Receipt Details